
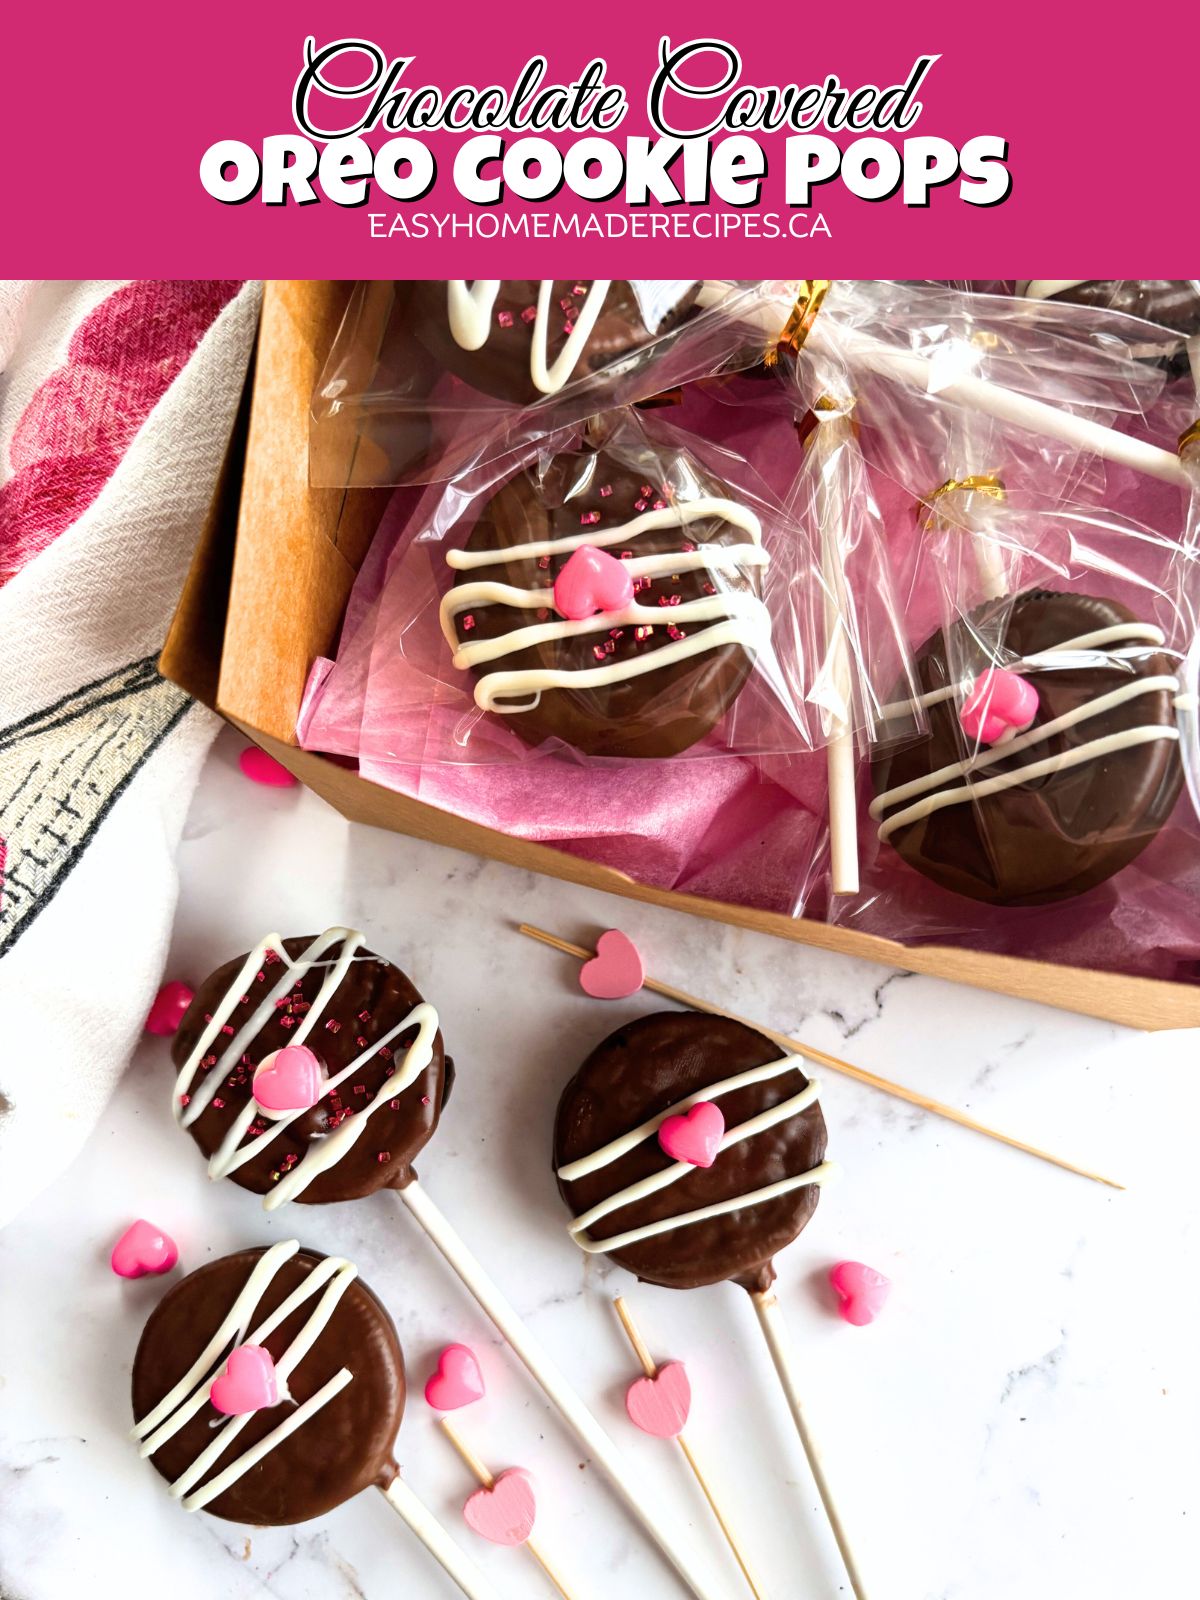
Chocolate covered cookie pops are a fun, no-bake treat made with classic sandwich cookies dipped in melted chocolate and finished with simple decorations. Easy to customize for holidays, parties or special occasions
If you like chocolate desserts, then you'll love some Easy Chocolate Dessert Recipes you can make at home, Cookies and Cream Mini Desserts or my easy Chocolate Peppermint Wafers.
Visit my recipe box for some more great recipe ideas inspired by Italian tradition!

Jump to:
Here's Why You'll Love these
These chocolate dipped oreo cookies are the perfect dessert on Valentine's day. But you can select different colors for different times of the year. For example, you can select green chocolate for St. Patrick's Day or purple, yellow and pink for Easter.
You'll love these also because:
- no baking required
- made with simple, store bought cookies
- easy to decorate for any occasion
- great for parties, holidays and dessert tables
If you are looking for other crafts to do with your kids, why not try this Herb and Vinegar Etched glass bottle using cricut tools. A craft you can give as a gift for any occasion.
This page contains affiliate links, which means I may receive commissions if you choose to purchase through links I provide (at no extra cost to you). Thank you for supporting the work I put into this site! As an Amazon Associate I earn from qualifying purchases.
Ingredients
These cookie pops come together with a few simple ingredients and it's a fun way to make something together with kids. You'll need double stuff sandwich cookies (Oreo), white chocolate wafers, milk chocolate wafers, cocoa butter chips/wafers, a small variety of sprinkles, and heart candies.
See recipe card for quantities.
What's the Best Chocolate for Melting?
To make this chocolatey treat, you'll want to use either chocolate chips or chocolate wafers (chocolate melts). The quality of chocolate really depends on what you are making or baking.
Different quality chocolates have different melting points. If the chocolate is too dry, you will want to add either some cocoa chips or you can use a high quality oil or fat that is mild in flavor. Add it as a half teaspoon at a time.
Try to stay away from adding any liquid to your chocolate as this will cause your chocolate to seize.
As soon as your chocolate has melted, remove it from the microwave or stove top. Be careful removing it not to burn your fingers by using kitchen mitts.
If you are using a microwave to melt your chocolate, microwave it for 30 seconds at a time, stirring at each interval.
Whether you are using the microwave or the stovetop, always use a glass bowl as this yields the best results for melting chocolate.
How to Make Chocolate Covered Cookie Pops
Prepare your cake pop stand and have it near you.
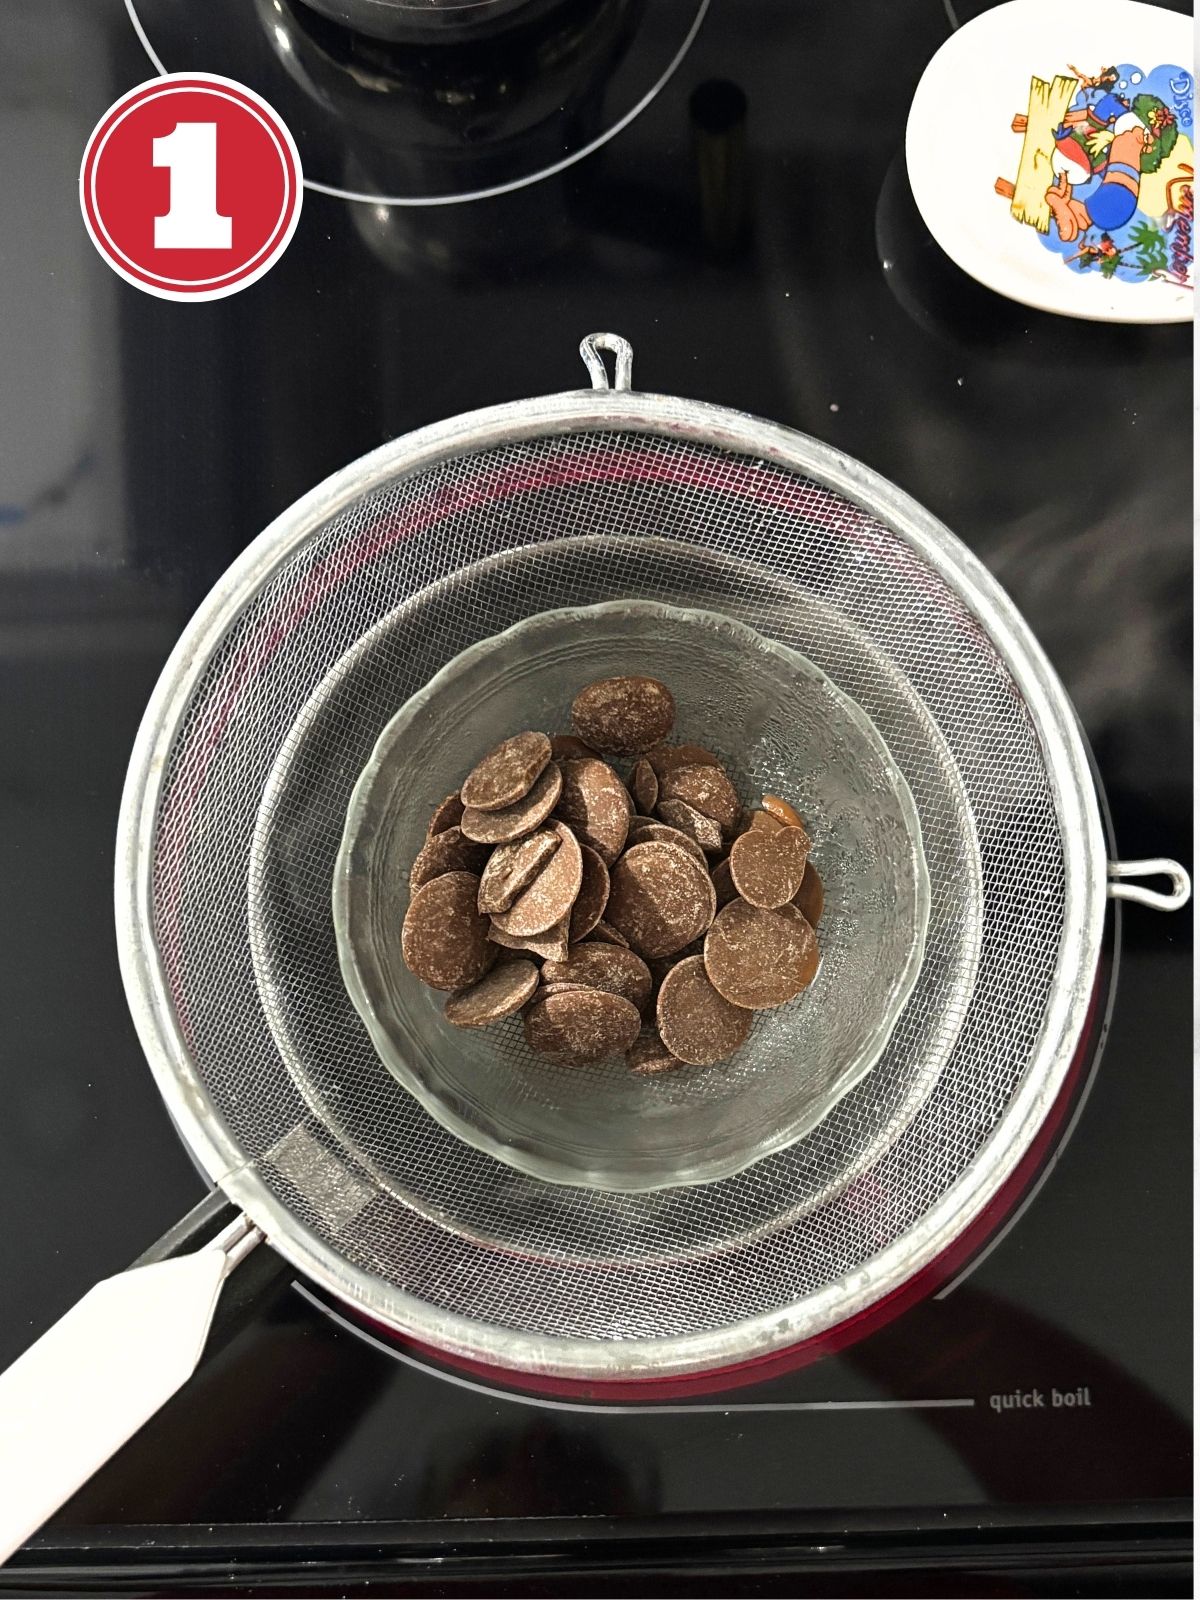
Place the chocolate wafers in bowl and melt the chocolate either in a double boiler or in the microwave.
Stir the chocolate occasionally so that it melts evenly. If you find that your chocolate is too dry and thick, add some pure cocoa butter chips (unflavored).

Prepare a small ramekin and place some hot water inside half way. If you are melting your chocolate on a double boiler, you can use the unused water after melting your chocolate.
Once your chocolate has melted, carefully remove it. Stir to smooth out the chunks. Pour it in the glass and place the glass in the ramekin with the warm water. That will keep the chocolate from cooling down to quickly.
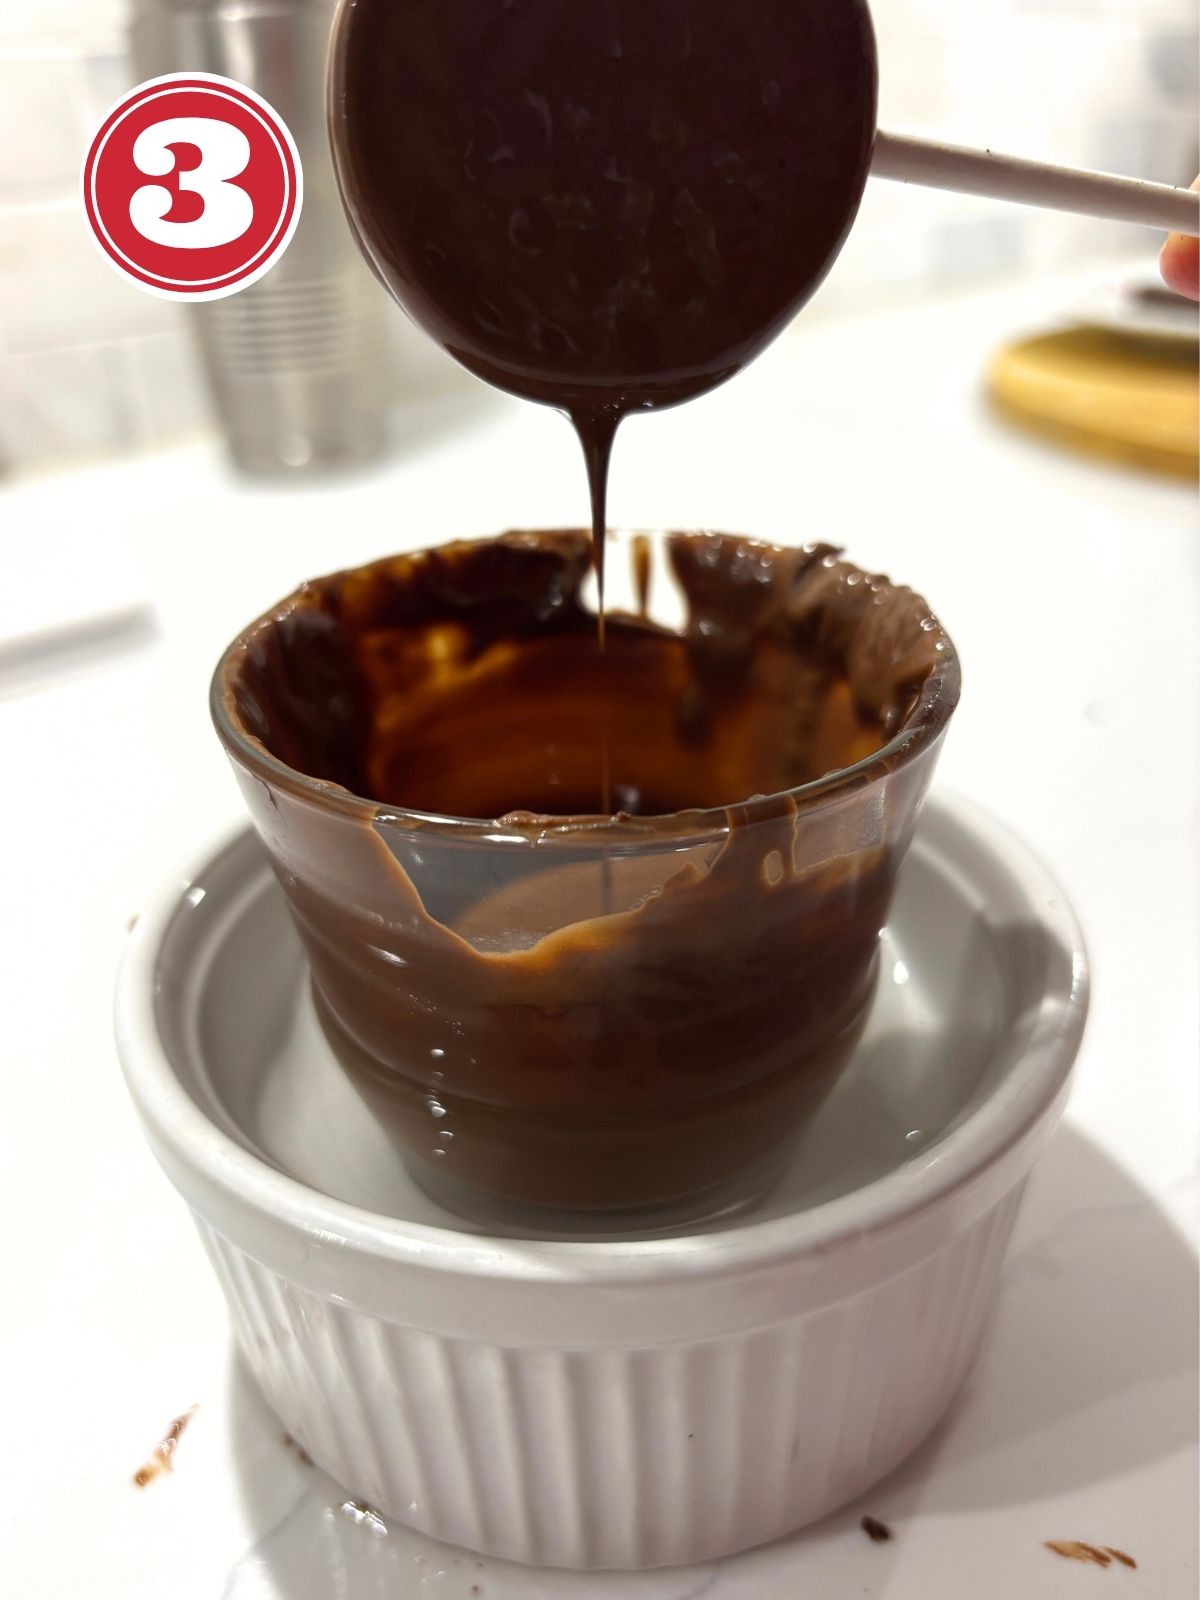
Place a cake pop stick through the ore cookie, then dunk the oreo cookie in the chocolate carefully pulling it up. Use a spoon to scoop more chocolate to cover any missed spots on the oreo. (You might need a fork to guide and keep the oreo from sliding off the lollipop stick as you lift it from the chocolate.)
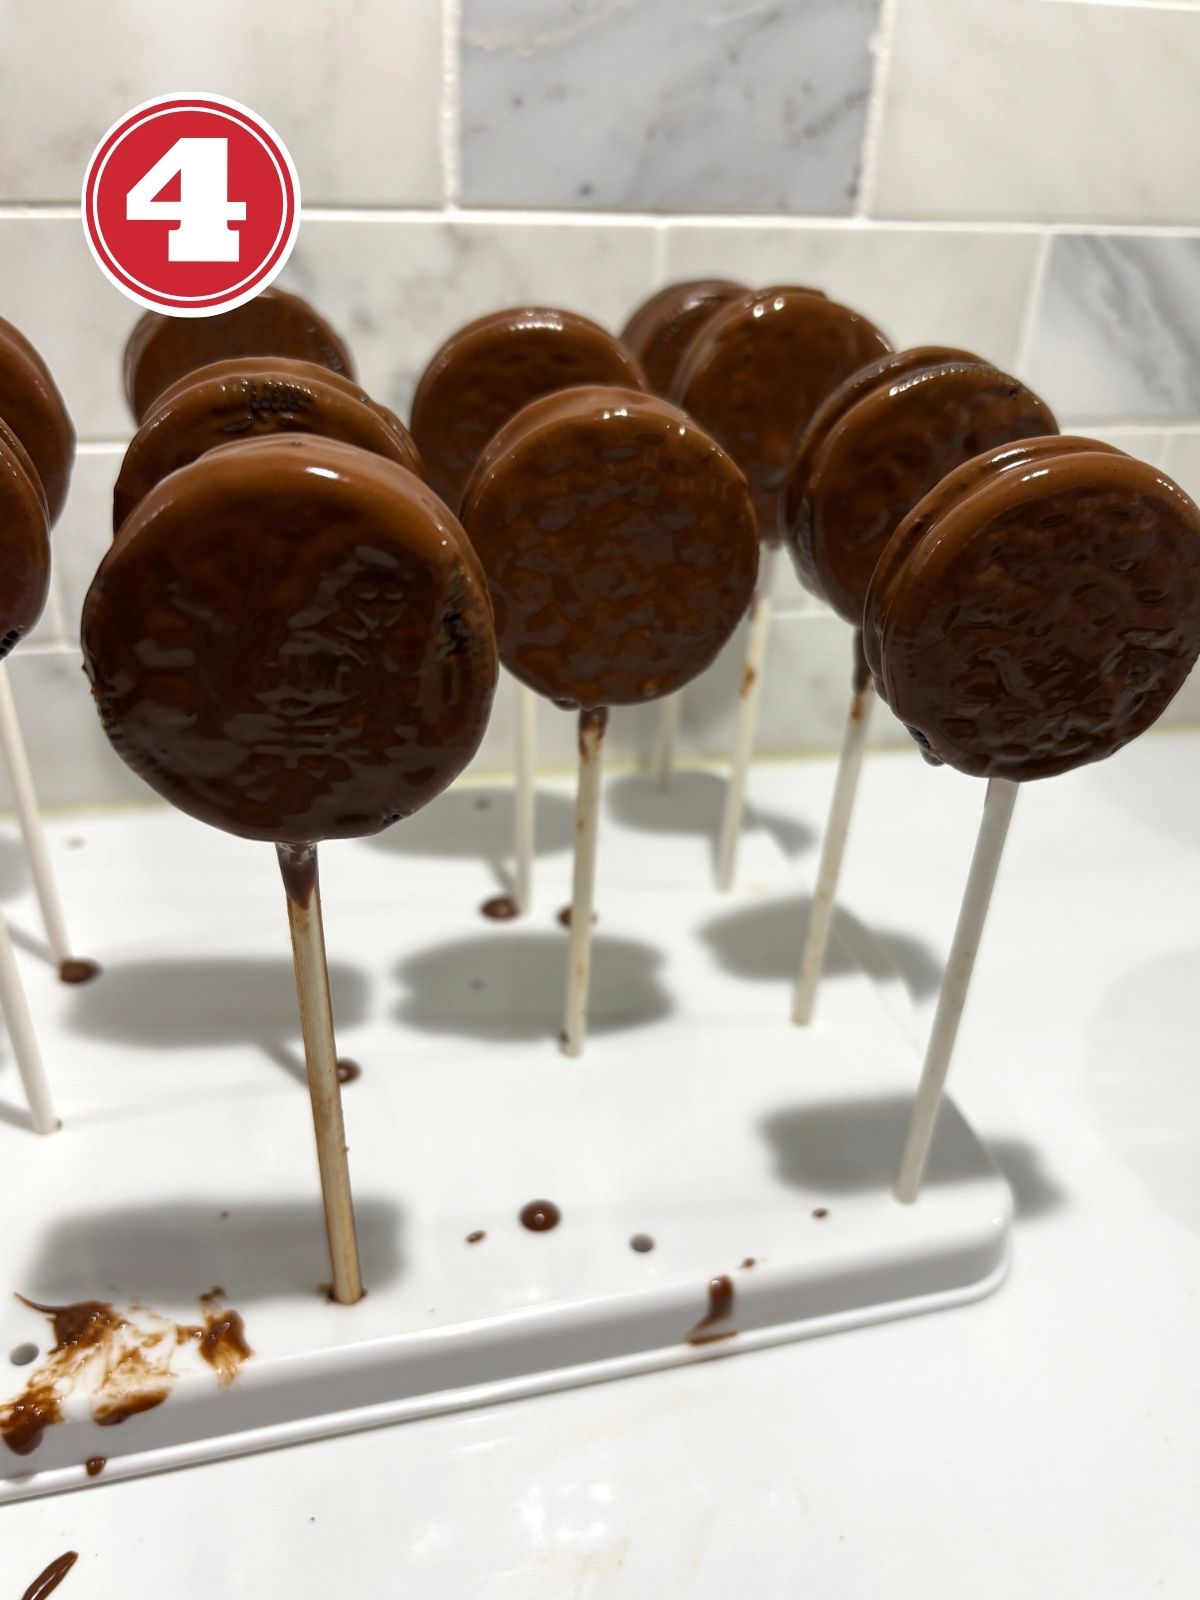
Place it on a cake pop stand with the stick side down to dry. Try and scrape any excess chocolate that's dripping down the pop stick with a spoon. You can come back later with a wet paper towel to get any small stains.
Repeat and let the cookies cool until dry, about 24 hrs.
Transfer the dried cookie pops on to a cooling rack.
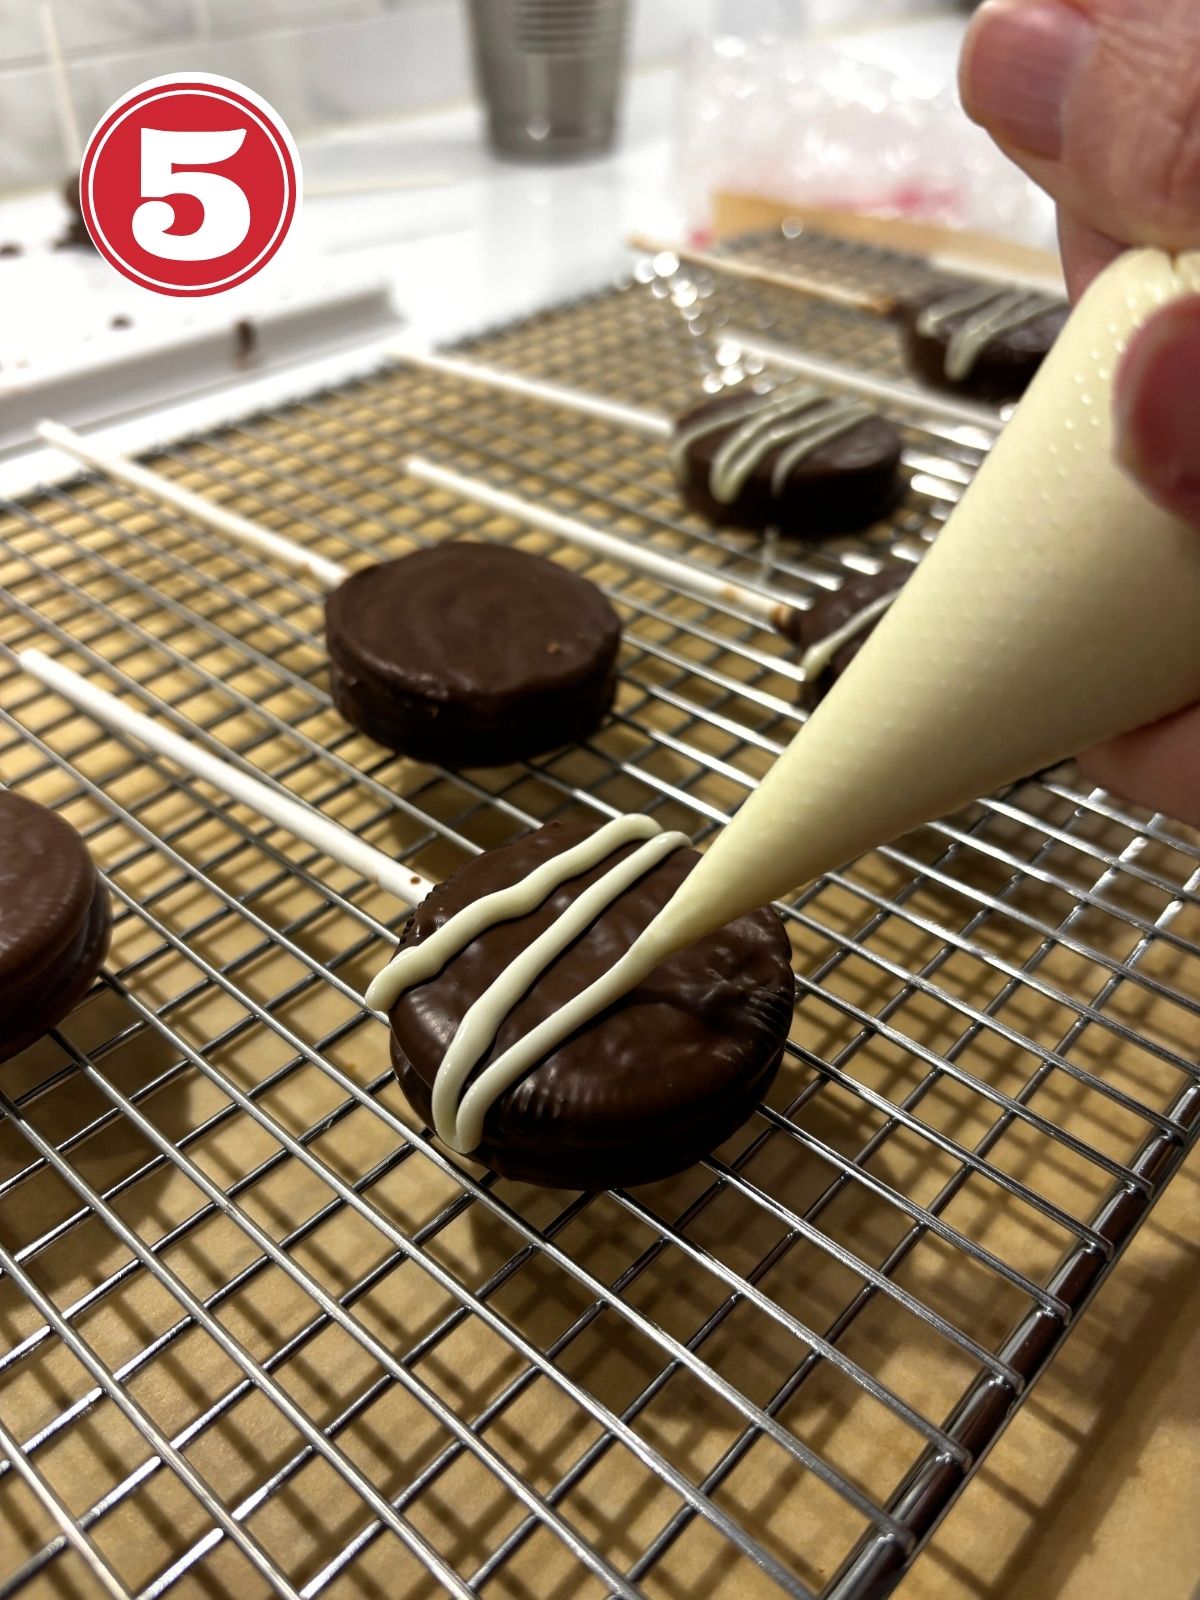
Melt the white chocolate and let it cool enough to place in a piping back or in a sandwich bag. Let it cool enough so it doesn't melt the bag.
Snip off a little hole in the corner and pipe a zig zag on the oreo cookies. Repeat until all have been decorated.
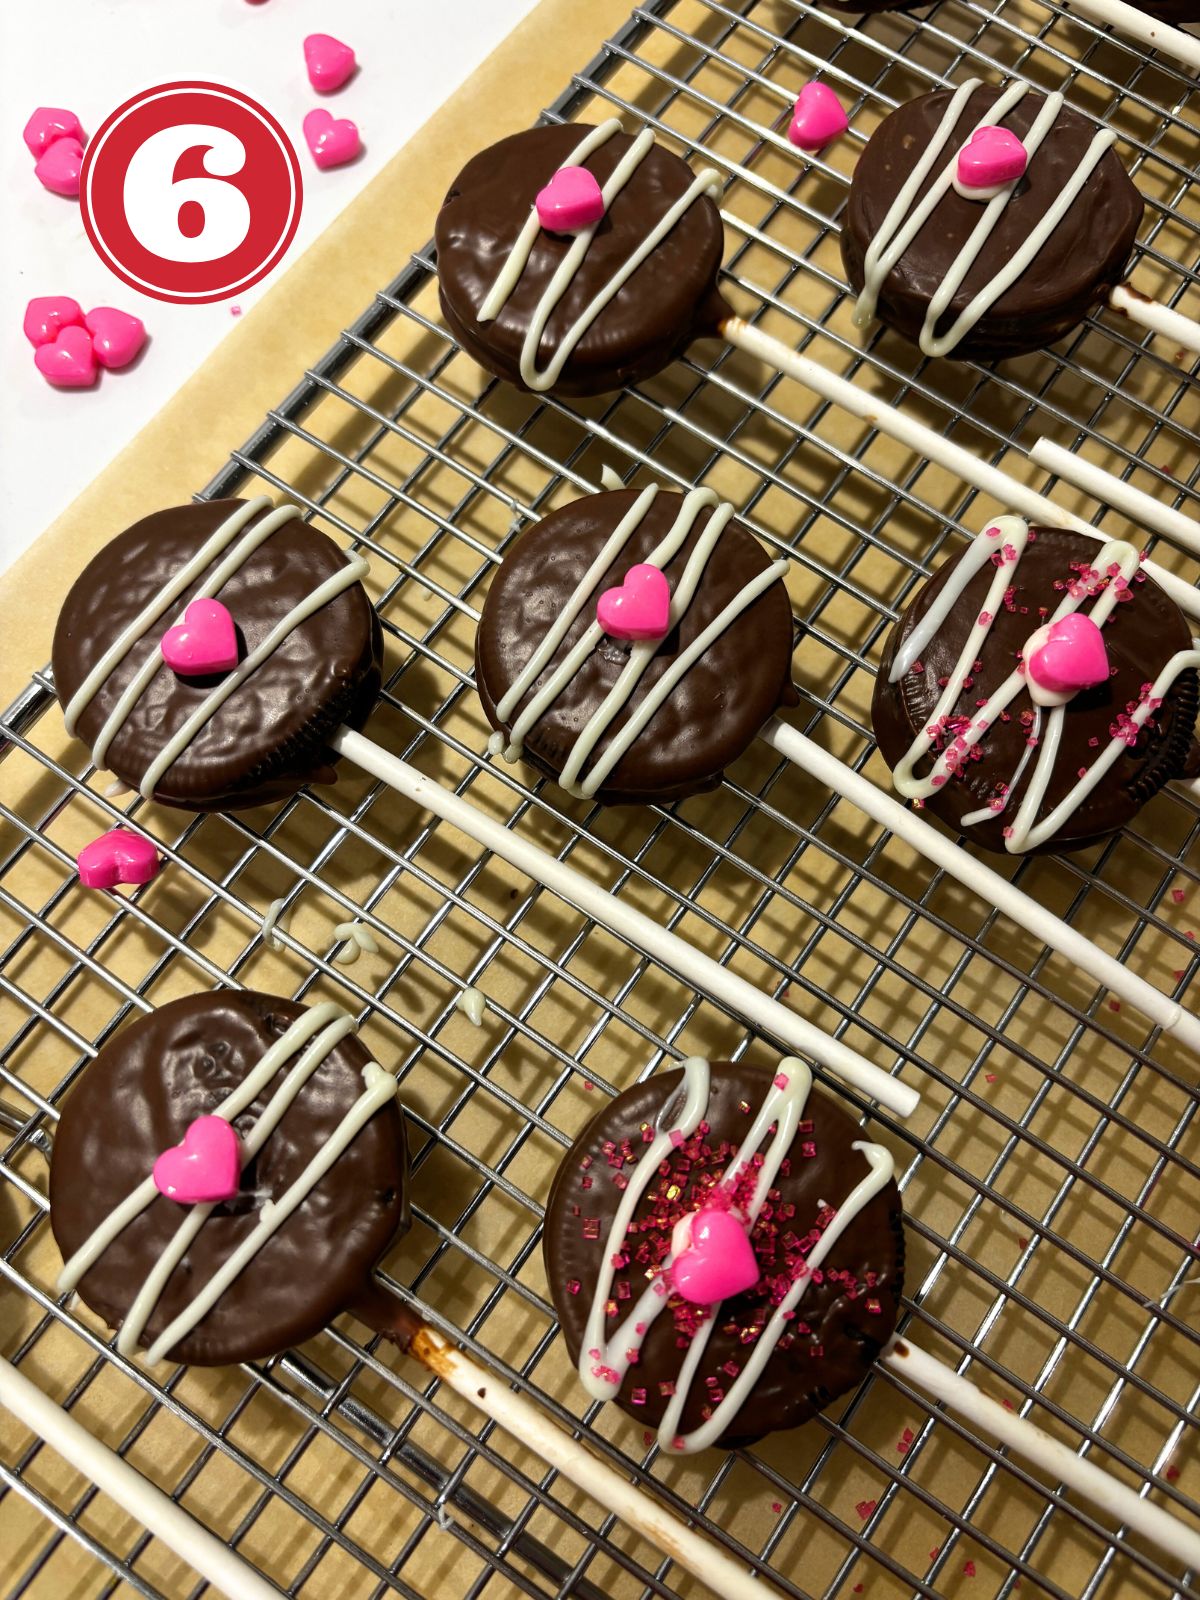
Decorate with colorful sprinkles and place hearts in the center by piping a dab of chocolate on one side of the heart and sticking it in the centre of the cookie.
Top Tips
Gently push the cookie stick into the filling.
Melt chocolate slowly to avoid overheating.
If using a microwave, heat chocolate wafers for 30 second intervals, stirring after each cycle. Reduce the time as the chocolate melts.
Let excess chocolate drip off cookies before placing them on cookie stand.
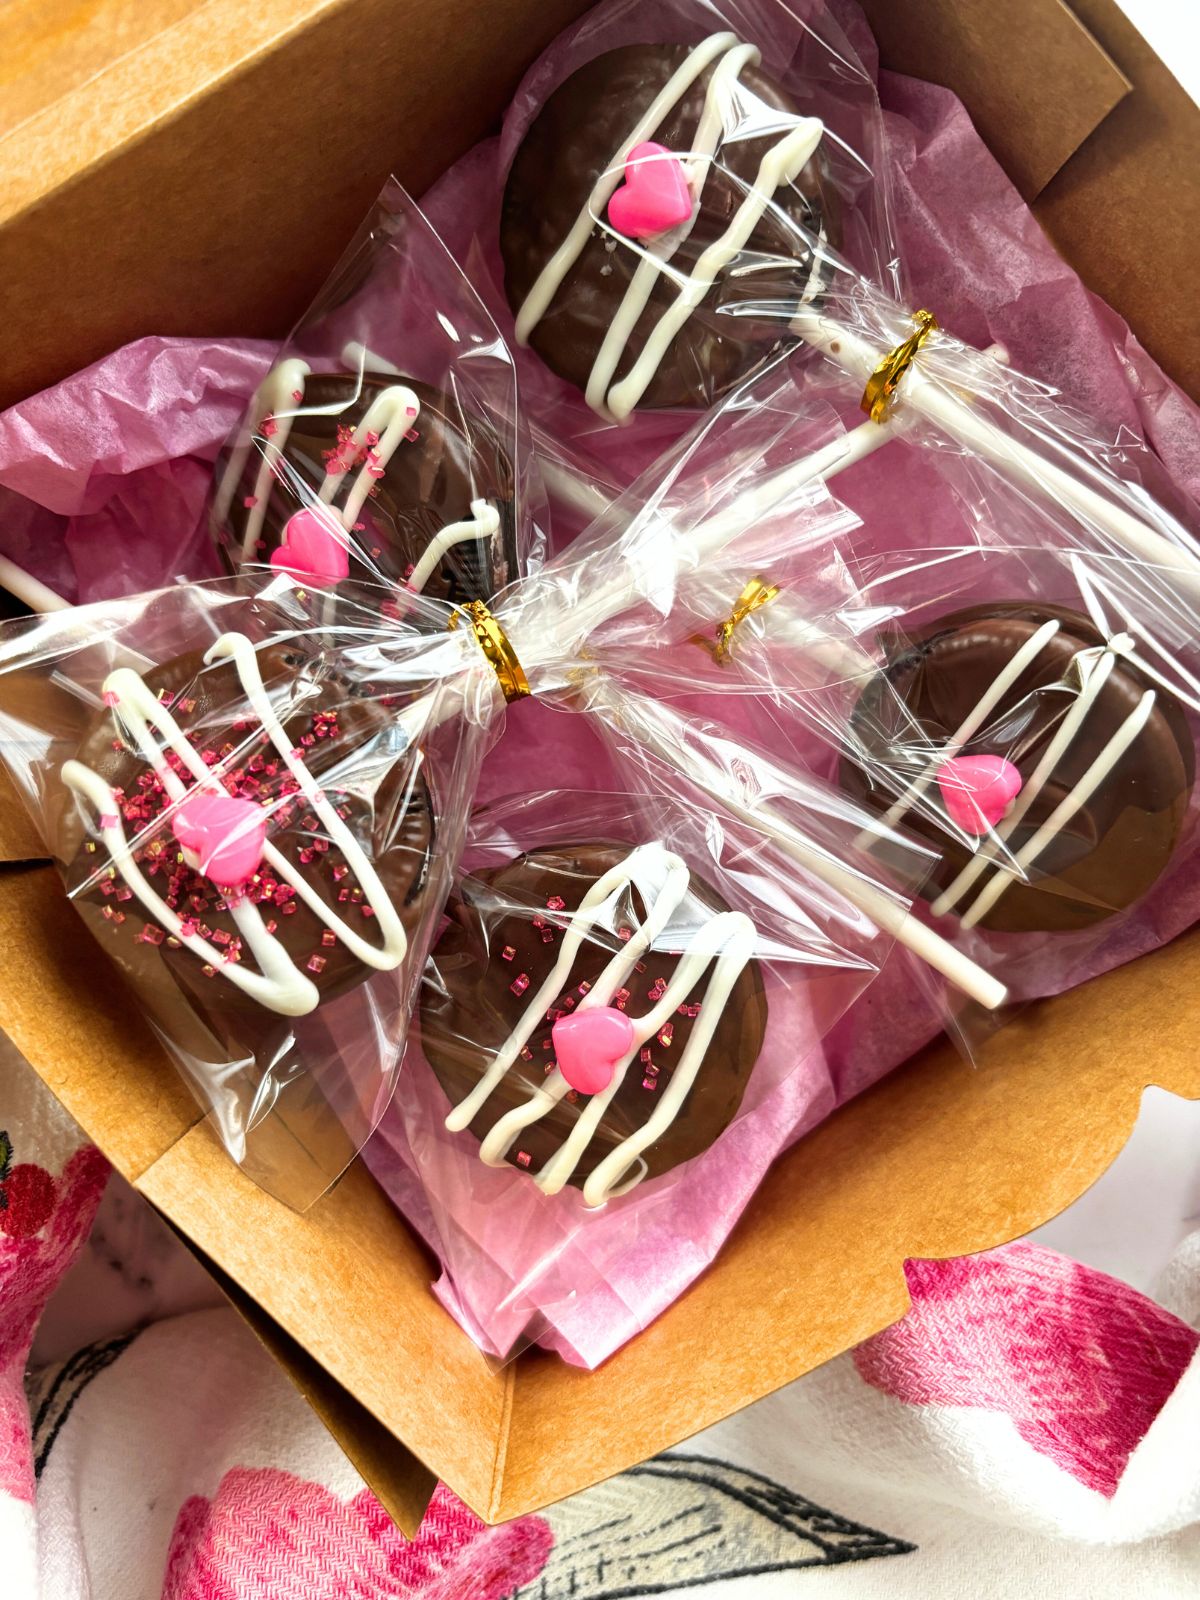
Allow cookies to fully set before packaging or serving.
Use a damp paper towel to wipe any chocolate off the pop sticks before storing or giving them away.
Storage
These Chocolate covered Oreo cookies will store well in an air-tight container for 3 to 4 weeks.I haven't frozen these dipped cookie pops therefore I can't recommended freezing.
Must Try Dessert Recipes

Recipe Details

Chocolate Covered Cookie Pops
https://easyhomemaderecipes.caAffiliate Disclosure
This page contains affiliate links, which means I may receive commissions if you choose to purchase through links I provide (at no extra cost to you). Thank you for supporting the work I put into this site! As an Amazon Associate I earn from qualifying purchases.
Equipment
Ingredients
- 5 oz milk chocolate wafers
- ½ oz pure cocoa butter chips
- 2 oz white chocolate wafers
- 8 oz double stuff Oreo cookies 15 cookies
- 15 pink candy hearts optional, decoration
- 2 tbsp assorted sprinkles each
Instructions
- Place the chocolate wafers in bowl and melt the chocolate either in a double boiler or in the microwave.5 oz milk chocolate wafers
- If you are using a microwave, heat for 30 seconds at at time in a glass bowl.
- If you don't have a double boiler, use a pot of water brought to a boil topped with a steel colander and then place your glass bowl in the colander. Stir the chocolate occasionally so that it melts evenly. If you find that your chocolate is too dry and thick, add some pure cocoa butter chips (unflavored).½ oz pure cocoa butter chips
- Prepare a small ramekin and place some hot water inside half way. If you are melting your chocolate on a double boiler, you can use the unused water after melting your chocolate.
- Once your chocolate has melted, carefully remove it. Stir to smooth out the chunks. Pour it in the glass and place the glass in the ramekin with the warm water. That will keep the chocolate from cooling down to quickly.
- Place a cake pop stick through the ore cookie, then dunk the oreo cookie in the chocolate carefully pulling it up. Use a spoon to scoop more chocolate to cover any missed spots on the oreo. (You might need a fork to guide and keep the oreo from sliding off the cake pop stick as you lift it from the chocolate.)8 oz double stuff Oreo cookies
- Place it on a cake pop stand to dry. Try and scrape any excess chocolate that's dripping down the pop stick with a spoon. You can come back later with a wet paper towel to get any small stains.
- Repeat and let the cookies cool until dry, about 24 hrs.
Decoration
- Transfer the dried cookie pops on to a cooling rack.
- Melt the white chocolate and let it cool enough to place in a piping back or in a sandwich bag. Let it cool enough so it doesn't melt the bag. Snip off a little hole in the corner and pipe a zig zag on the oreo cookies. Repeat until all have been decorated.2 oz white chocolate wafers
- Sprinkle some decorations on top and place hearts in the center by piping a dab of chocolate on one side of the heart and sticking it in the centre of the cookie.15 pink candy hearts, 2 tbsp assorted sprinkles
Notes
Top Tips
Gently push the cookie stick into the filling. Melt chocolate slowly to avoid overheating. If using a microwave, heat chocolate wafers for 30 second intervals, stirring after each cycle. Reduce the time as the chocolate melts. Let excess chocolate drip off cookies before placing them on cookie stand. Allow cookies to fully set before packaging or serving. Use a damp paper towel to wipe any chocolate off the pop sticks before storing or giving them away.Nutrition
PIN It for Later here:
Food Safety
Note that the storage guidelines provided on this page and site are estimates from personal experiences. We are all adults and as an adult you are responsible to ensure that the food you eat is safe to eat. Since, I'm not a food safety expert, you are responsible to review your local guidelines on food storage prior to storing any food left-overs.
Remember to:
- Not use the same utensils on cooked food, that previously touched raw meat
- Wash hands after touching raw meat
- Don't leave food sitting out at room temperature for extended periods
- Never leave cooking food unattended
- Use oils with high smoking point to avoid harmful compounds
- Always have good ventilation when using a gas stove
For Canadian Guidelines check the Government of Canada Food Safety Guidelines or see more guidelines at USDA.gov.


Savelie says
These cookies look incredible 😍
Jak says
They look so good Amy!!! I'm trying these out for sure
Stephanie says
yummy yummy 🙂