
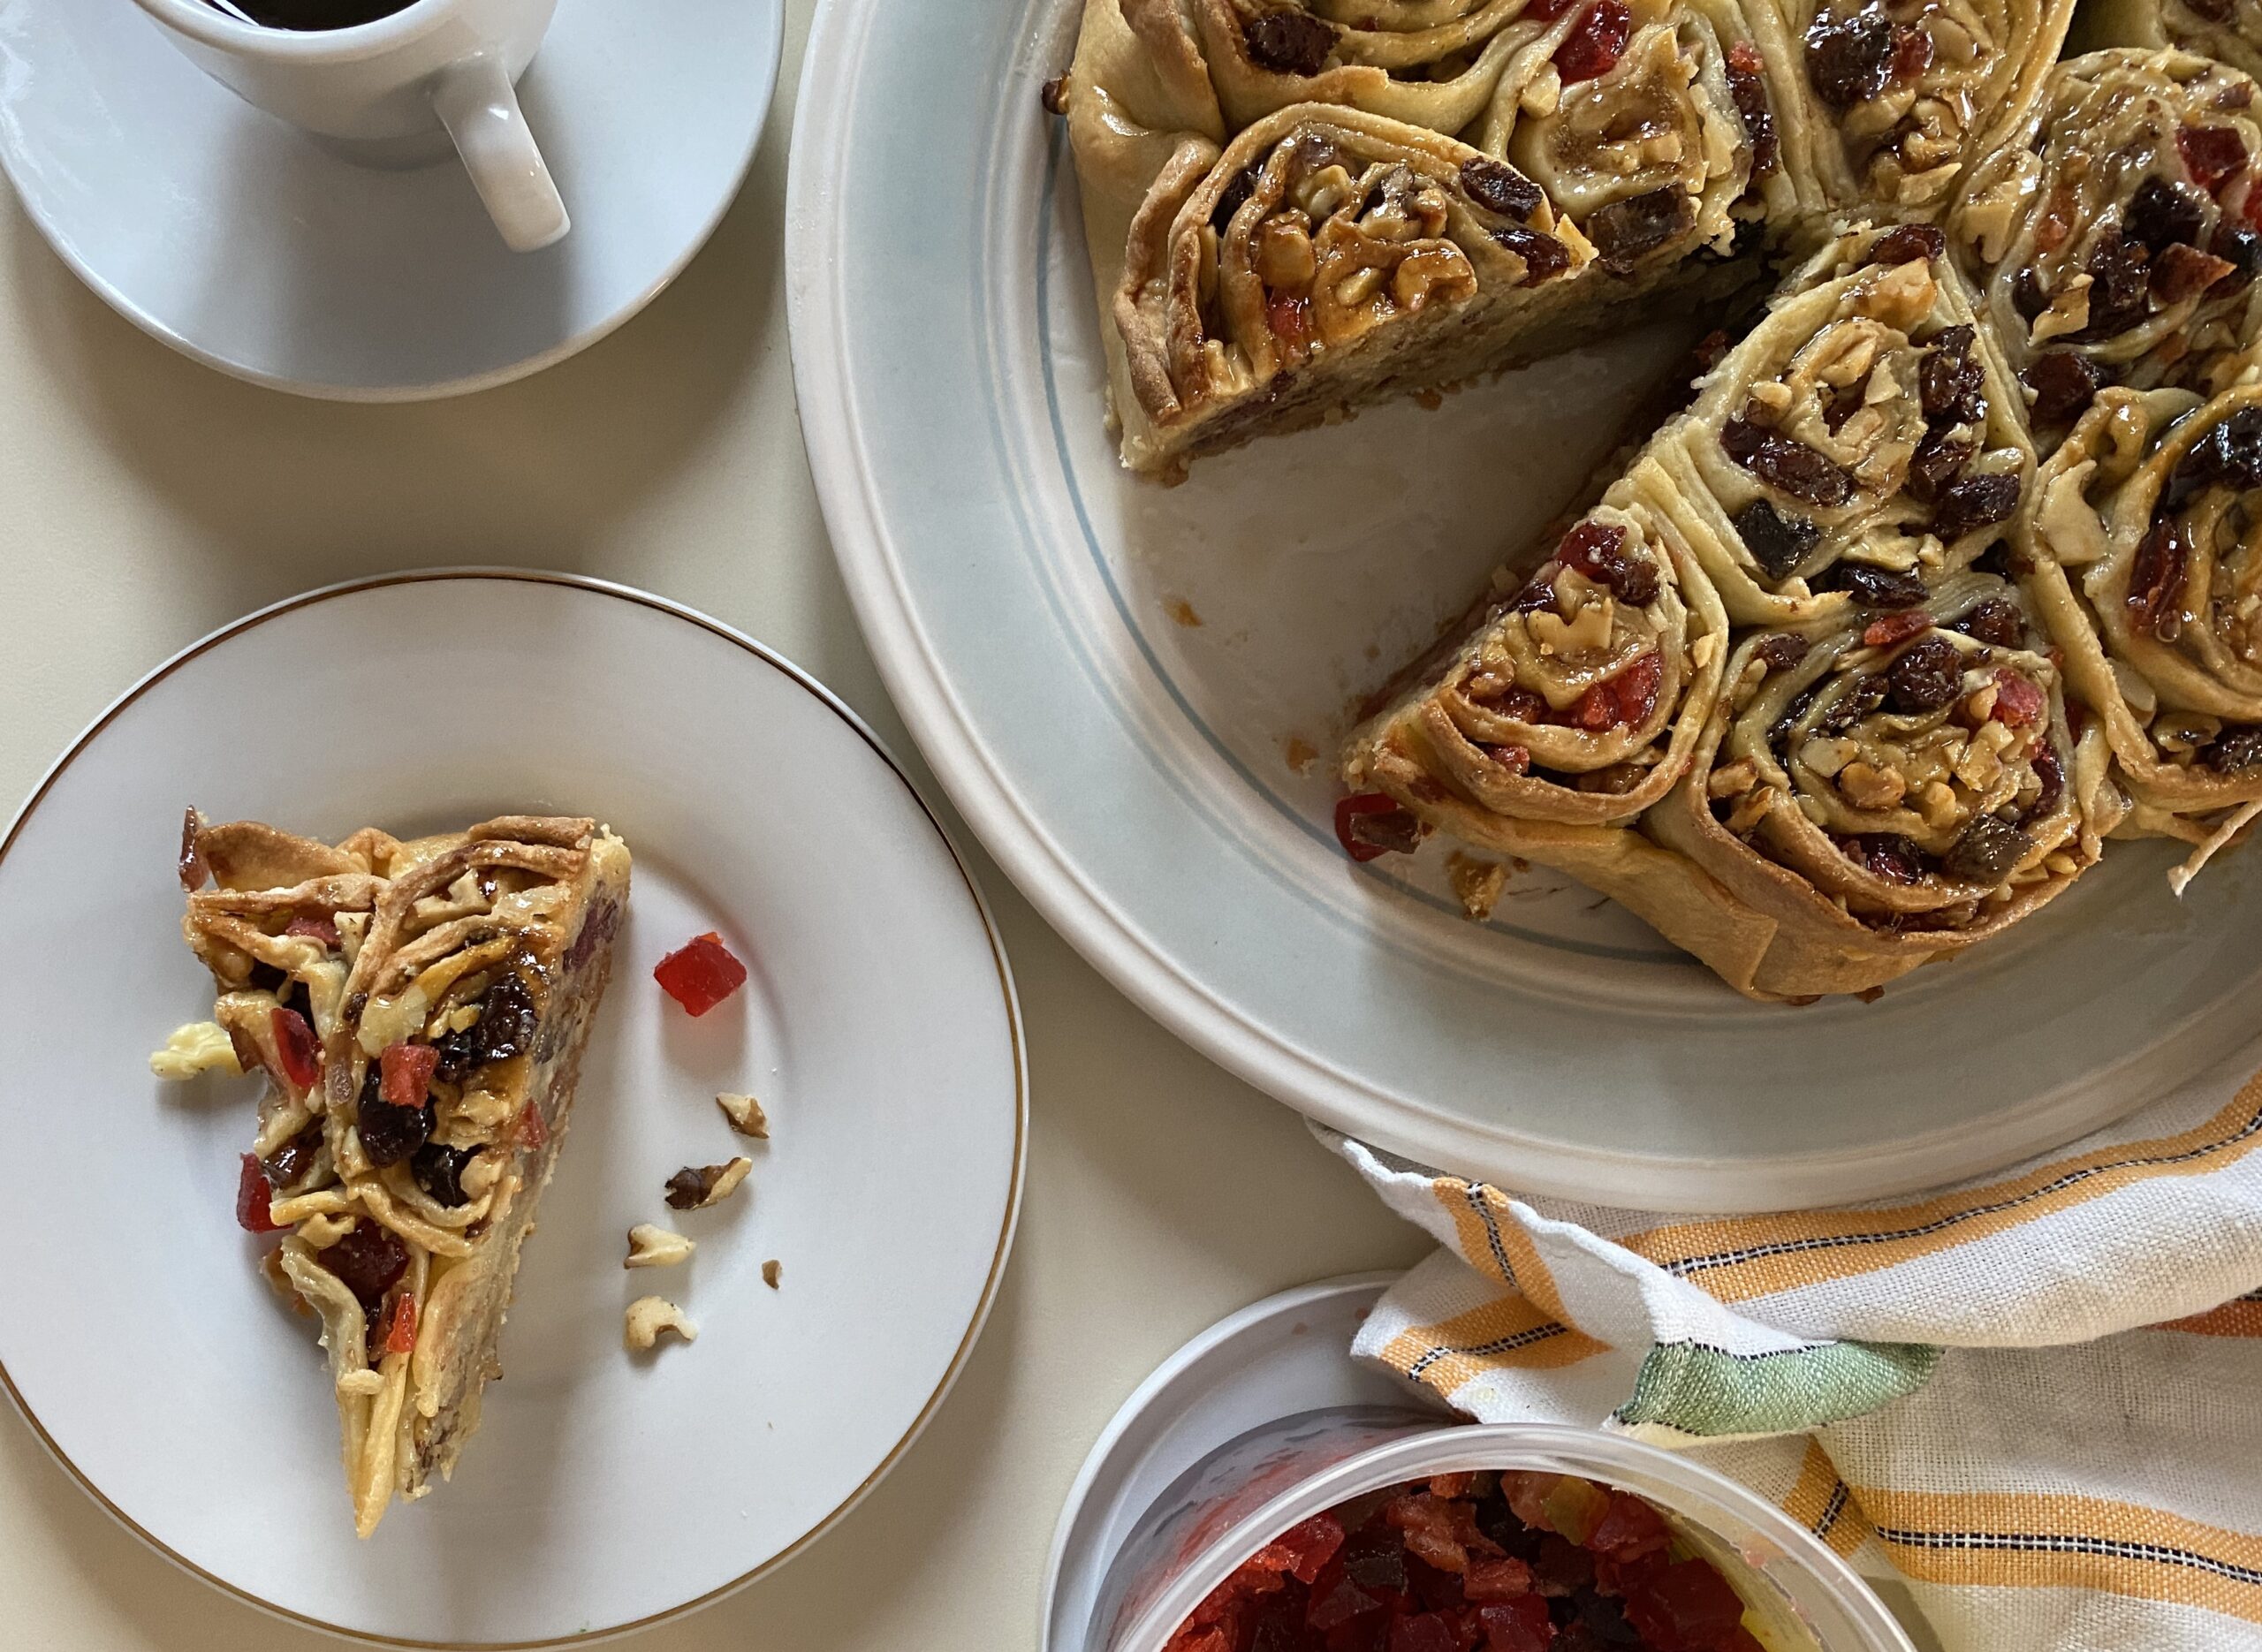
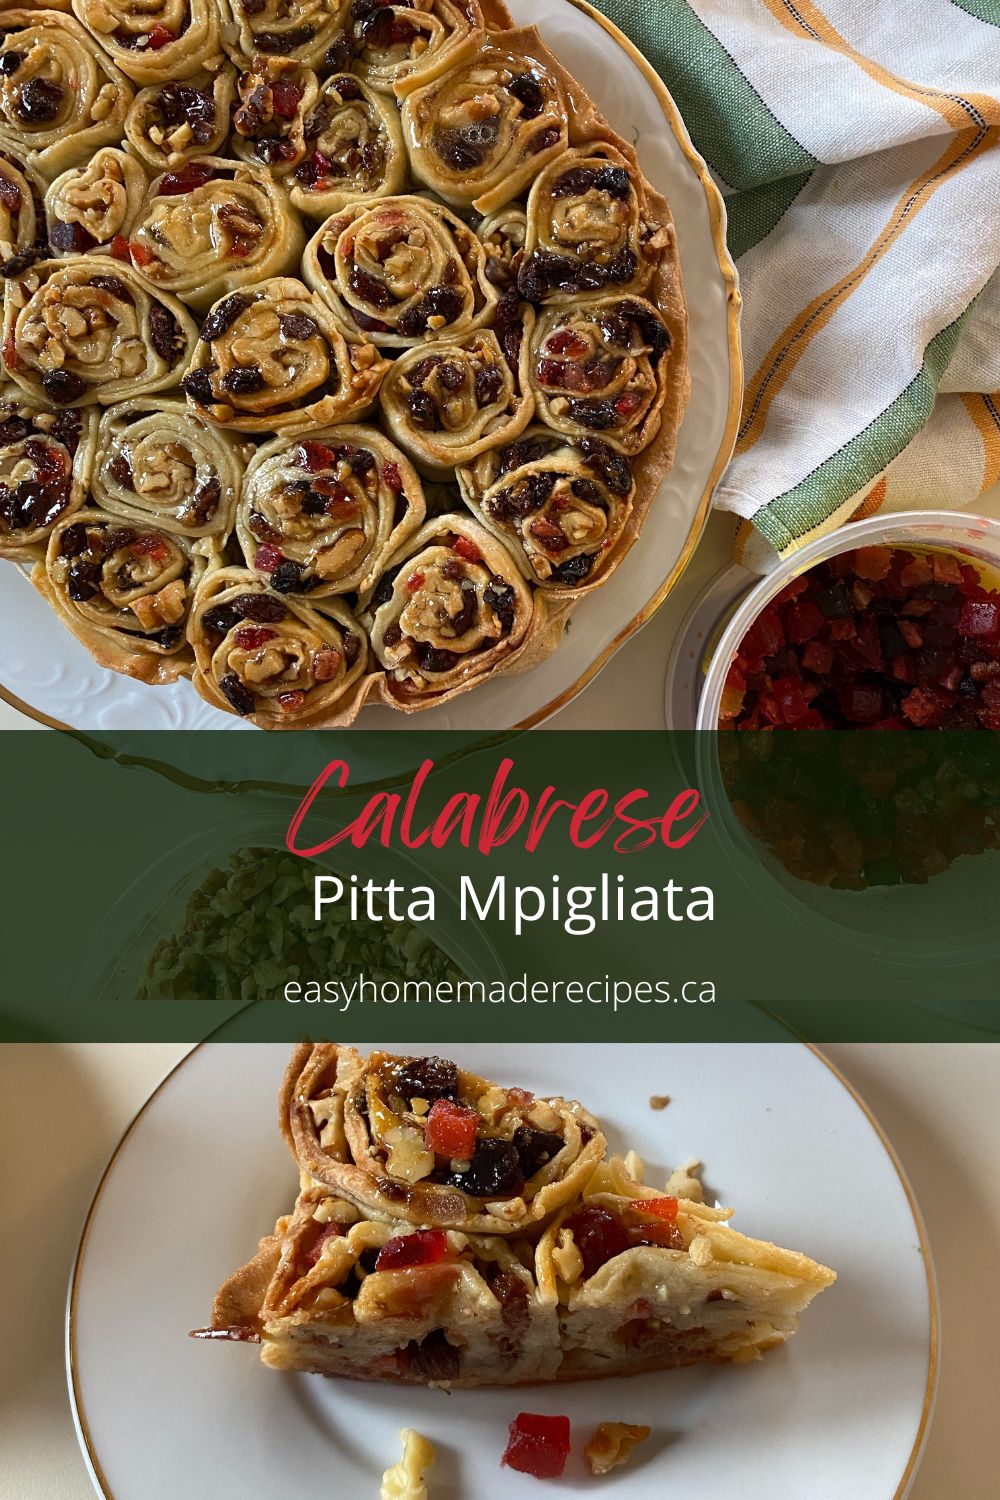
Growing up my mother made Pitta Mpigliata also known as Pitta Nchiusa or Pitta China, a traditional Italian Christmas dessert recipe made with dry wine, raisins and walnuts.
Originally this recipe passed down from my dads side of the family, my mom quickly adapted the recipe and added her own finishing touches, like candied fruit and honey.
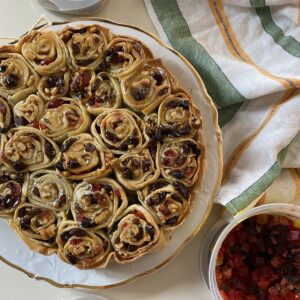
Pitta Mpigliatta, Pitta Nchiusa or Pitta China meaning filled or stuffed pastry is a dessert originating from the province of Calabria, Italy.
If you love traditional holiday desserts, try our recipe for Cuculi Calabrese or Calabrian Turdilli.
Jump to:
Pitta mpigliata is usually made in December and enjoyed at Christmas time. The ingredients are available all year round, making this a dessert that can be made and enjoyed any time of the year.
Needless to say that this particular recipe was inspired by my desire to learn more about Calabrese traditional dessert recipes in the hopes off passing down tradition from one generation to another.
This recipe for Pitta mpigliata, a traditional Italian fruit cake dessert does require a little bit of prep work. If you are looking for desserts that are quick and easy, try a 5 ingredient no bake cheesecake or a mille feuille recipe using frozen puff pastry dough.
This page contains affiliate links, which means I may receive commissions if you choose to purchase through links I provide (at no extra cost to you). Thank you for supporting the work I put into this site! As an Amazon Associate I earn from qualifying purchases.
Ingredients Needed to Make Pitta Mpigliata
While the original recipe included only raisins, my grandmother added walnuts as they were readily available and local. My mother adapted the recipe and added candied fruit and honey.
To make this recipe for Pitta Mpigliata you'll need the following ingredients:
- All purpose flour
- Eggs
- Sugar
- White Vermouth
- Liquor
- Shortening
- Raisins
- Cinnamon
- Ground Cloves
- Water
- Candied Fruit/Glace Fruit
- Walnuts, chopped
See recipe card for quantities.
Instructions on How to Make Pitta Mpigliatta
Use a medium fry pan to heat and rehydrate the raisins, with sugar and water until the raisins start to sizzle and the water has been absorbed.
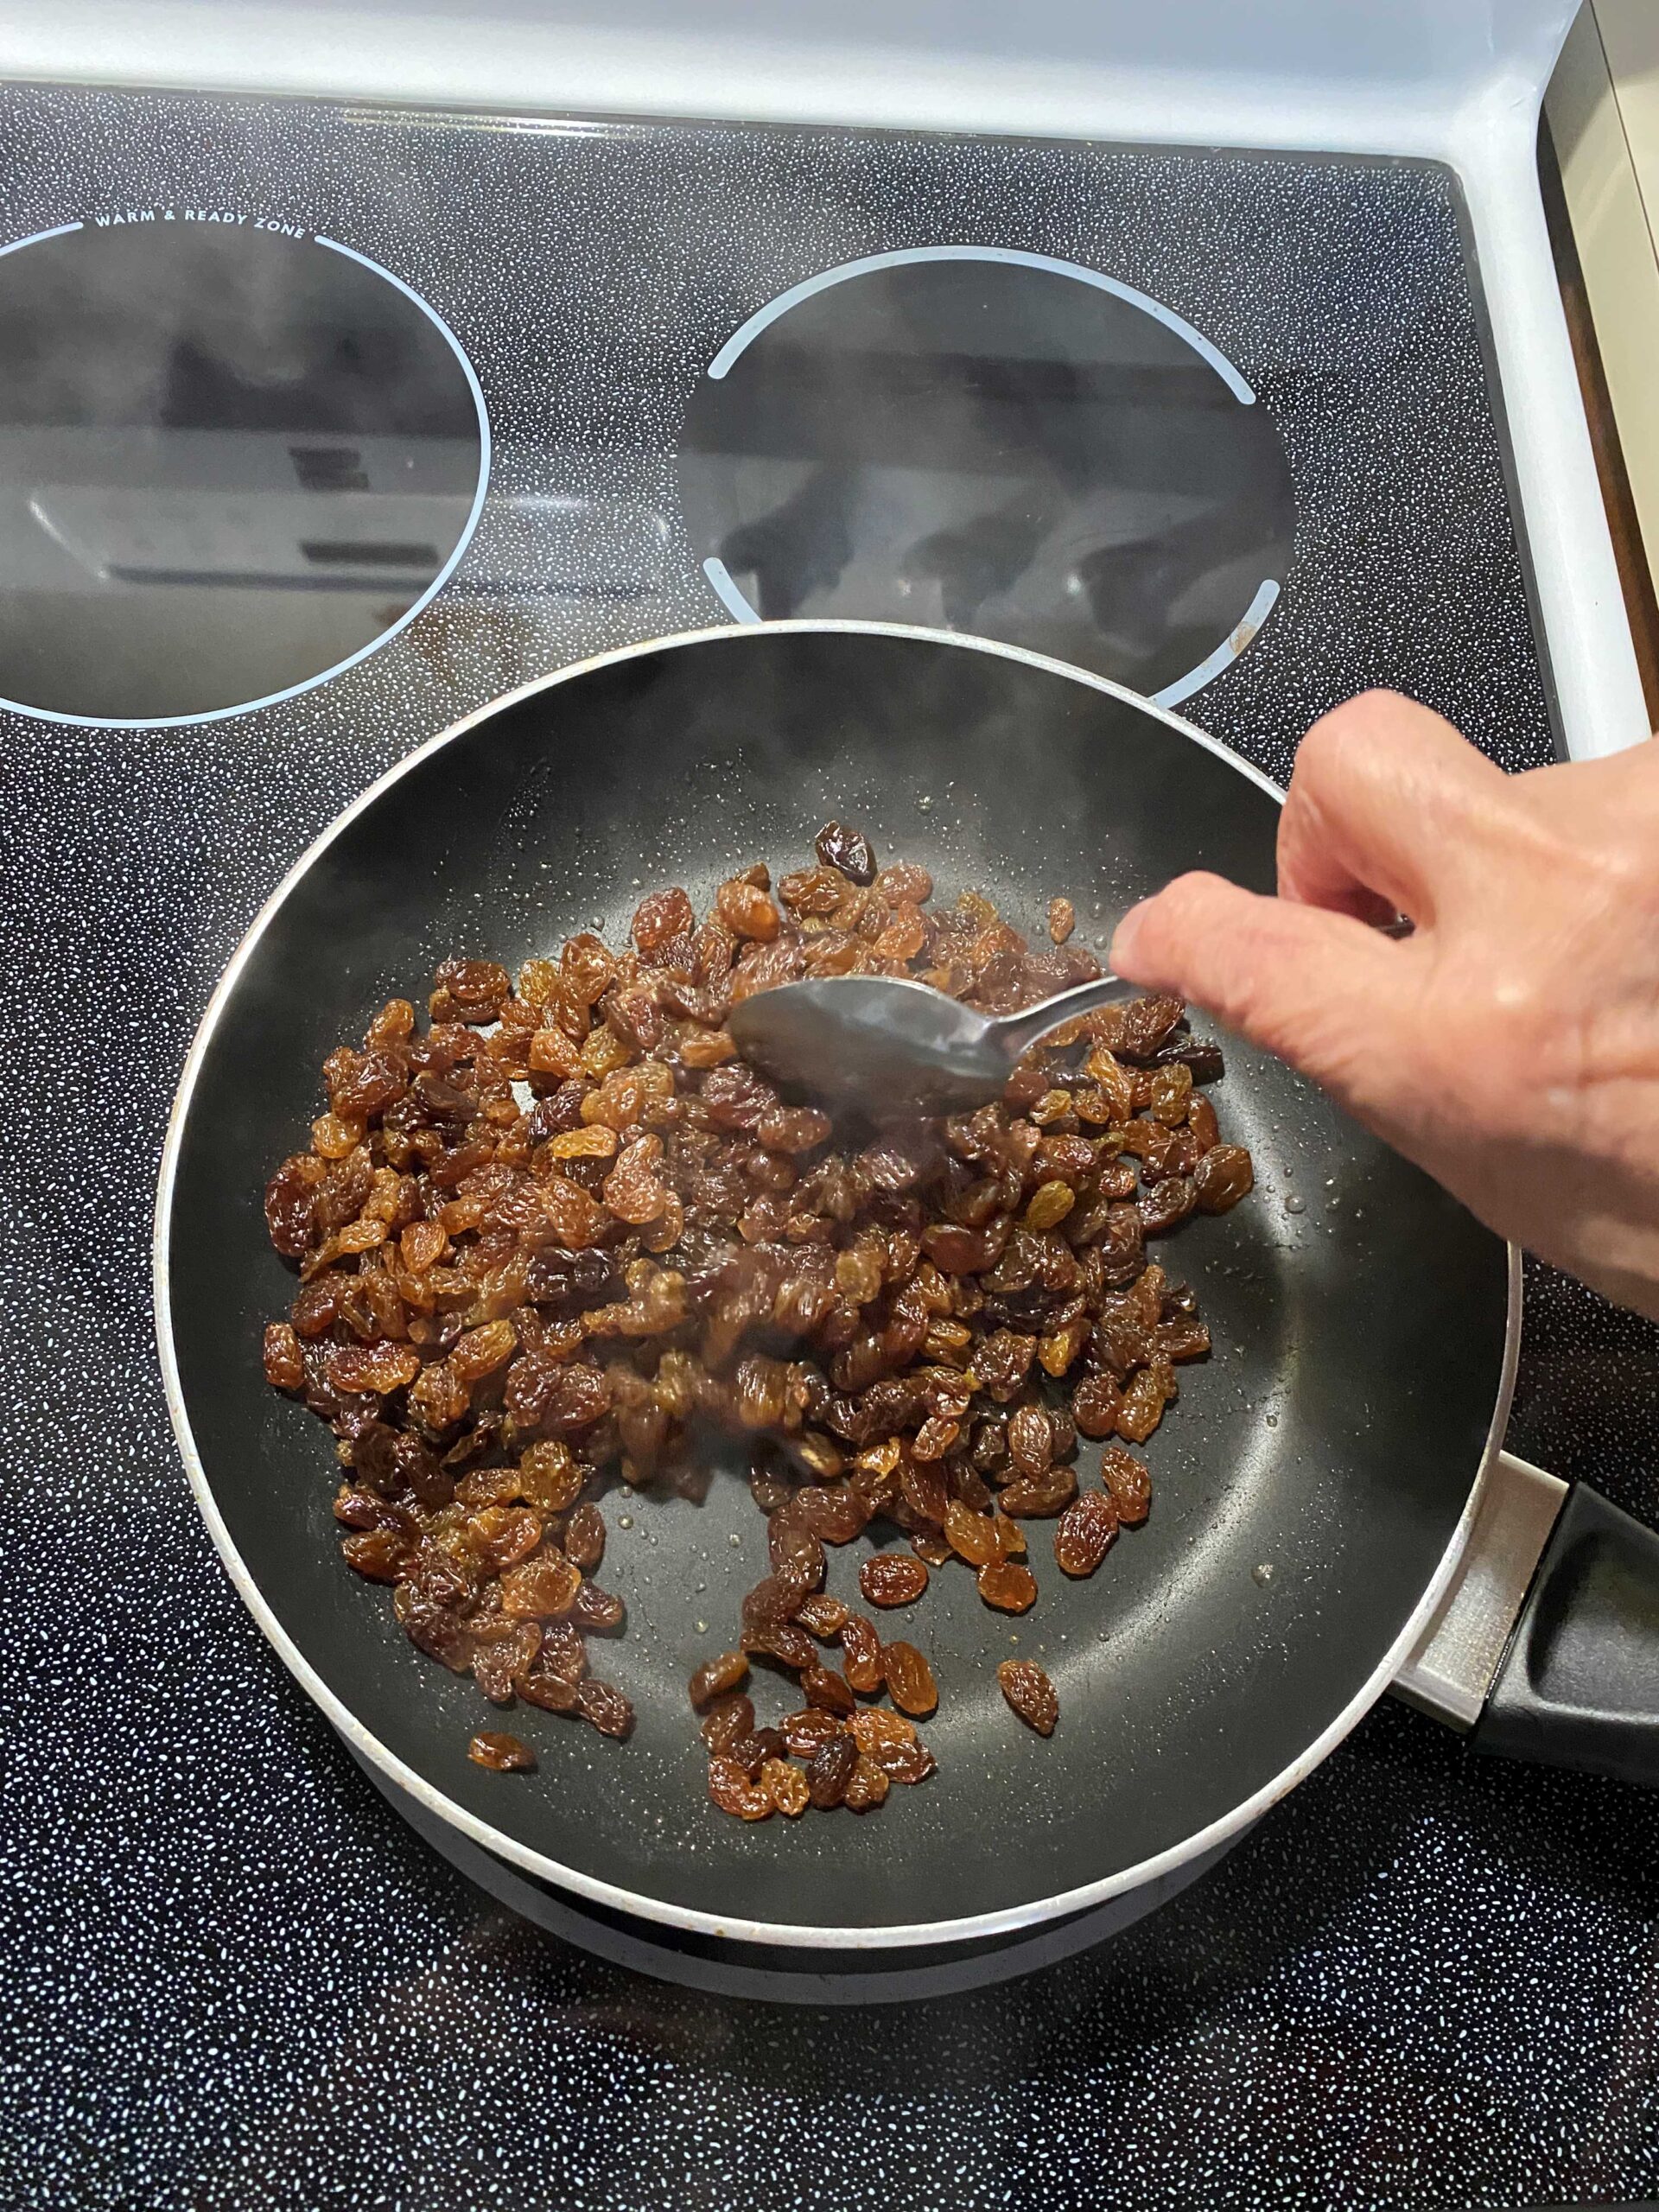
Break apart any raisins clumped together. Once the raisins have plumped up, remove from heat. When cool add cinnamon and cloves. Set aside.
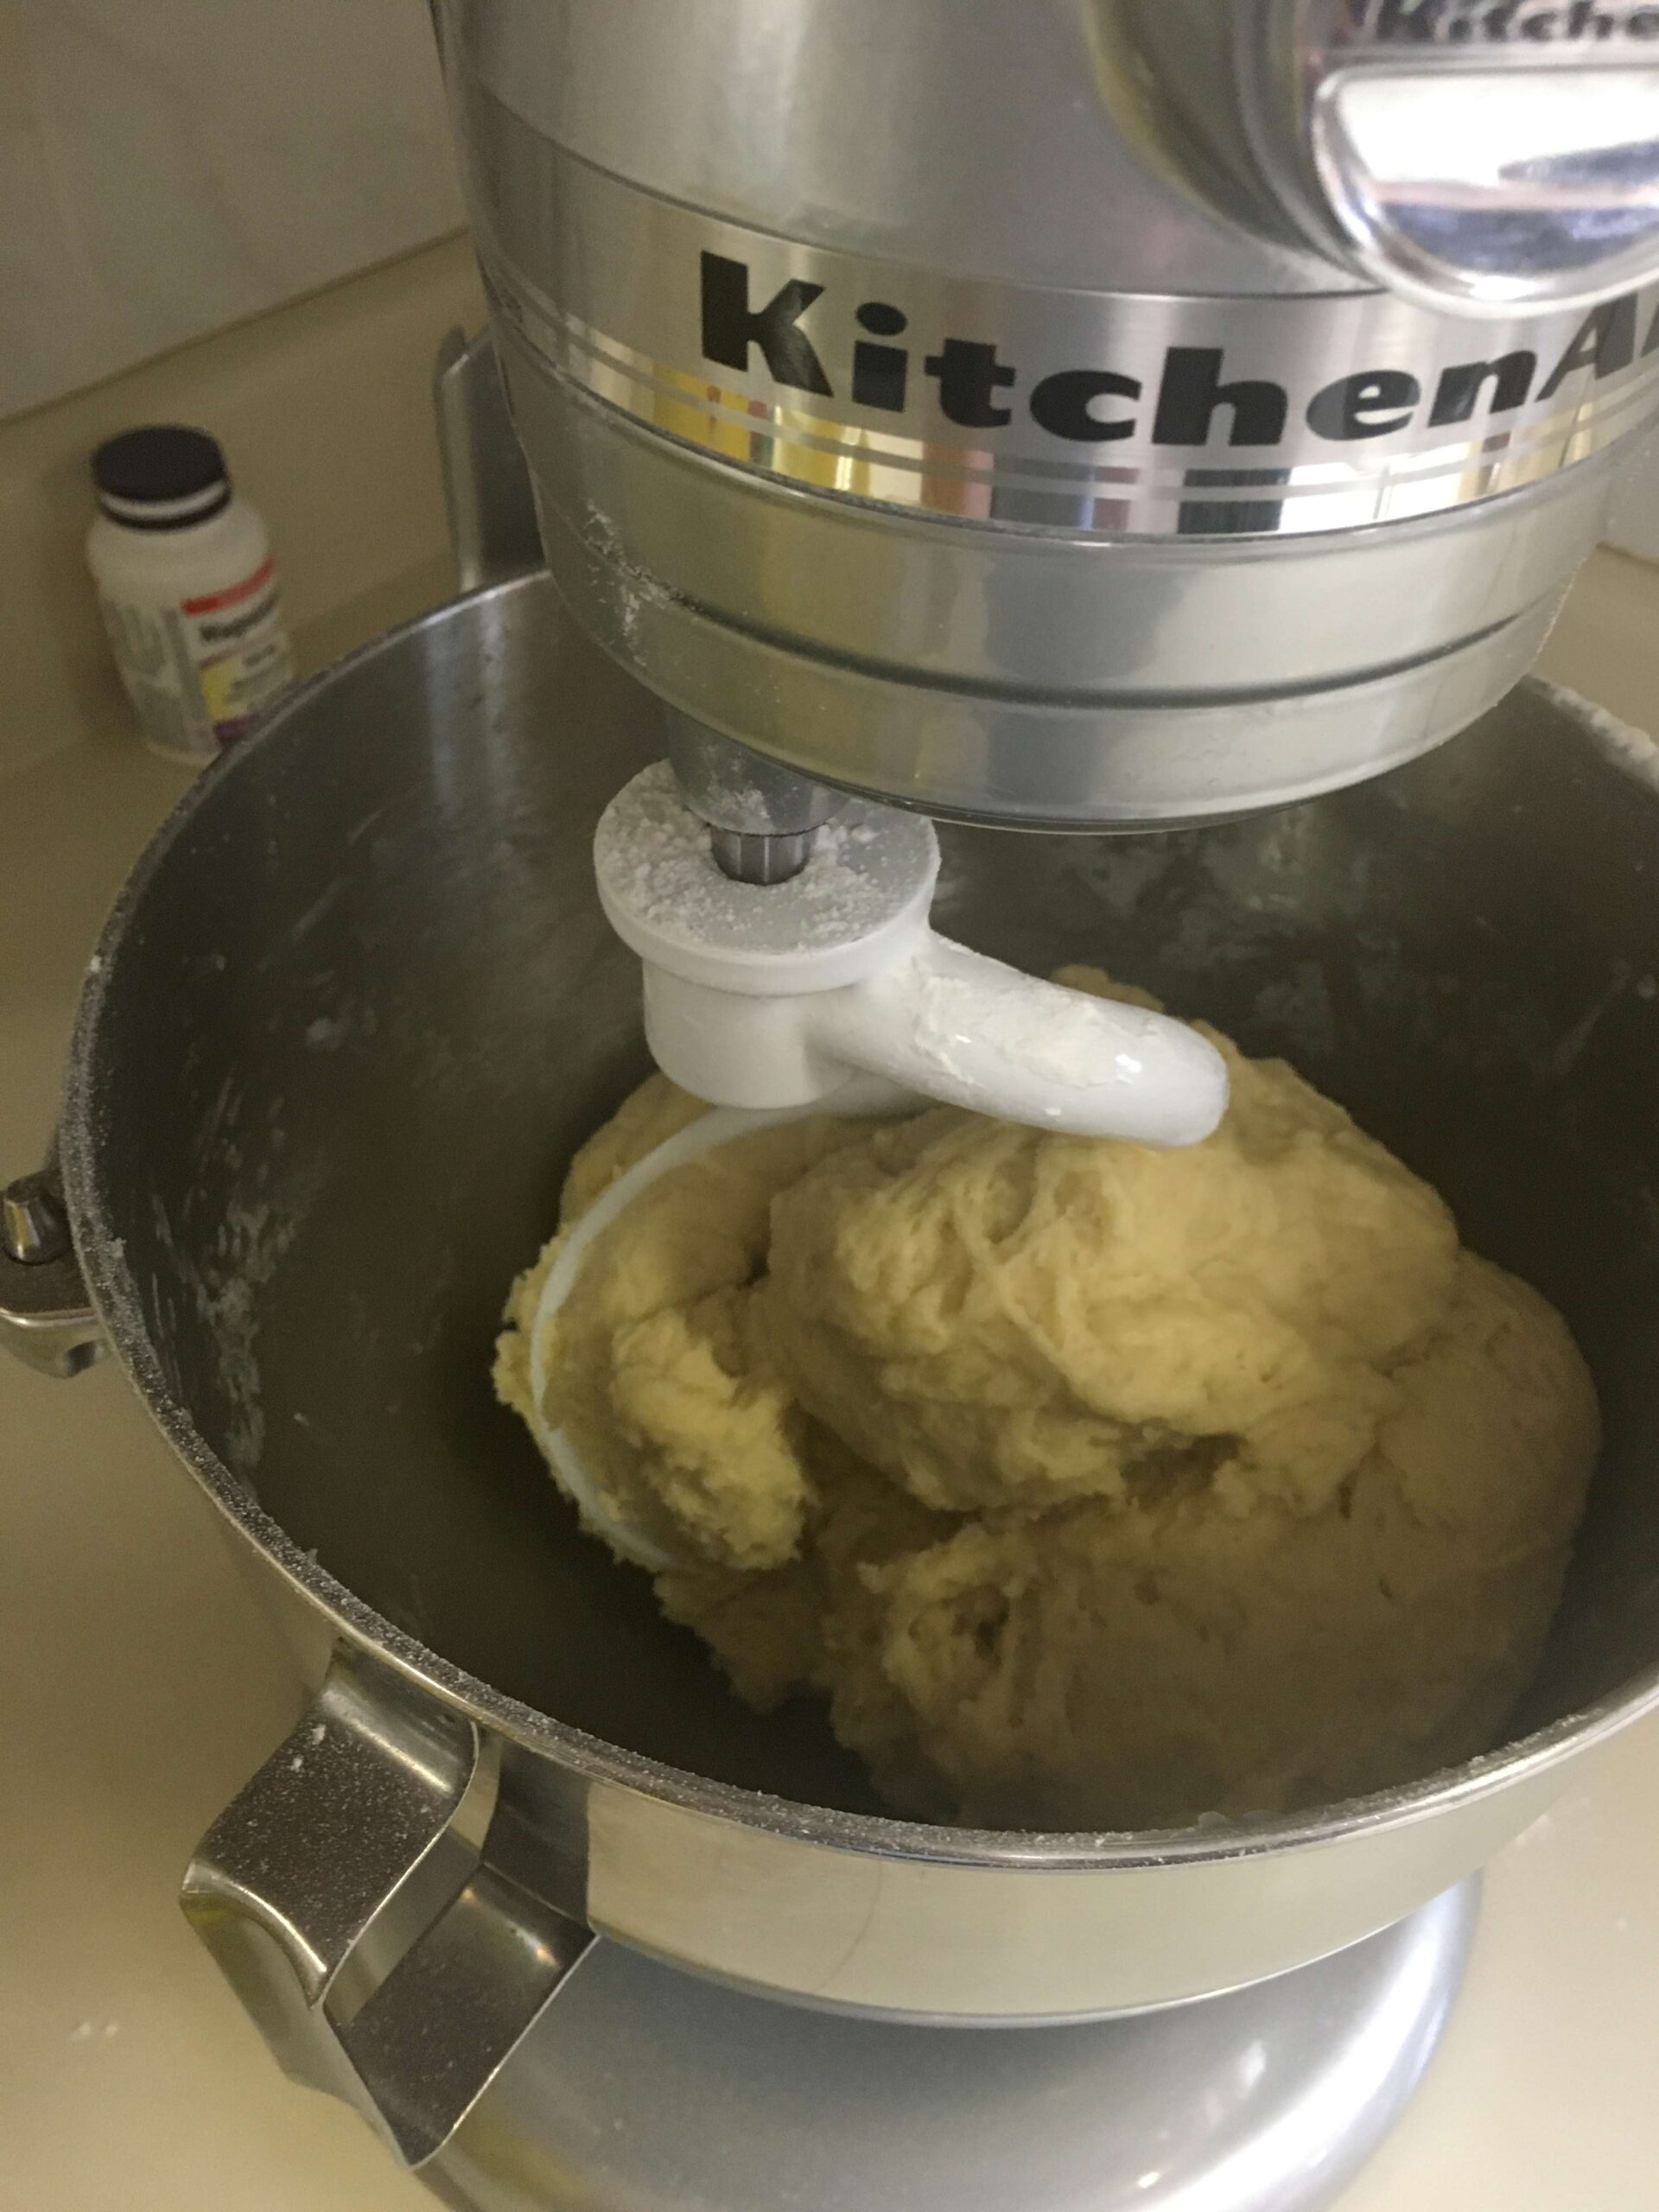
In the bowl of a stand mixer, beat the eggs then add oil, melted shortening, sugar, vermouth and liquor.
Switch to the dough hook start adding the flour one cup at a time until the dough is firm to the touch.

Roll out one large piece of dough on a floured surface. Transfer it to a table where you can work on filling and rolling.
Roll out the smaller piece which will be your base and place it on one side of a baking sheet covered with parchment paper.
Begin to sprinkle the raisins, walnuts and candied fruit all over the pitta sheet.
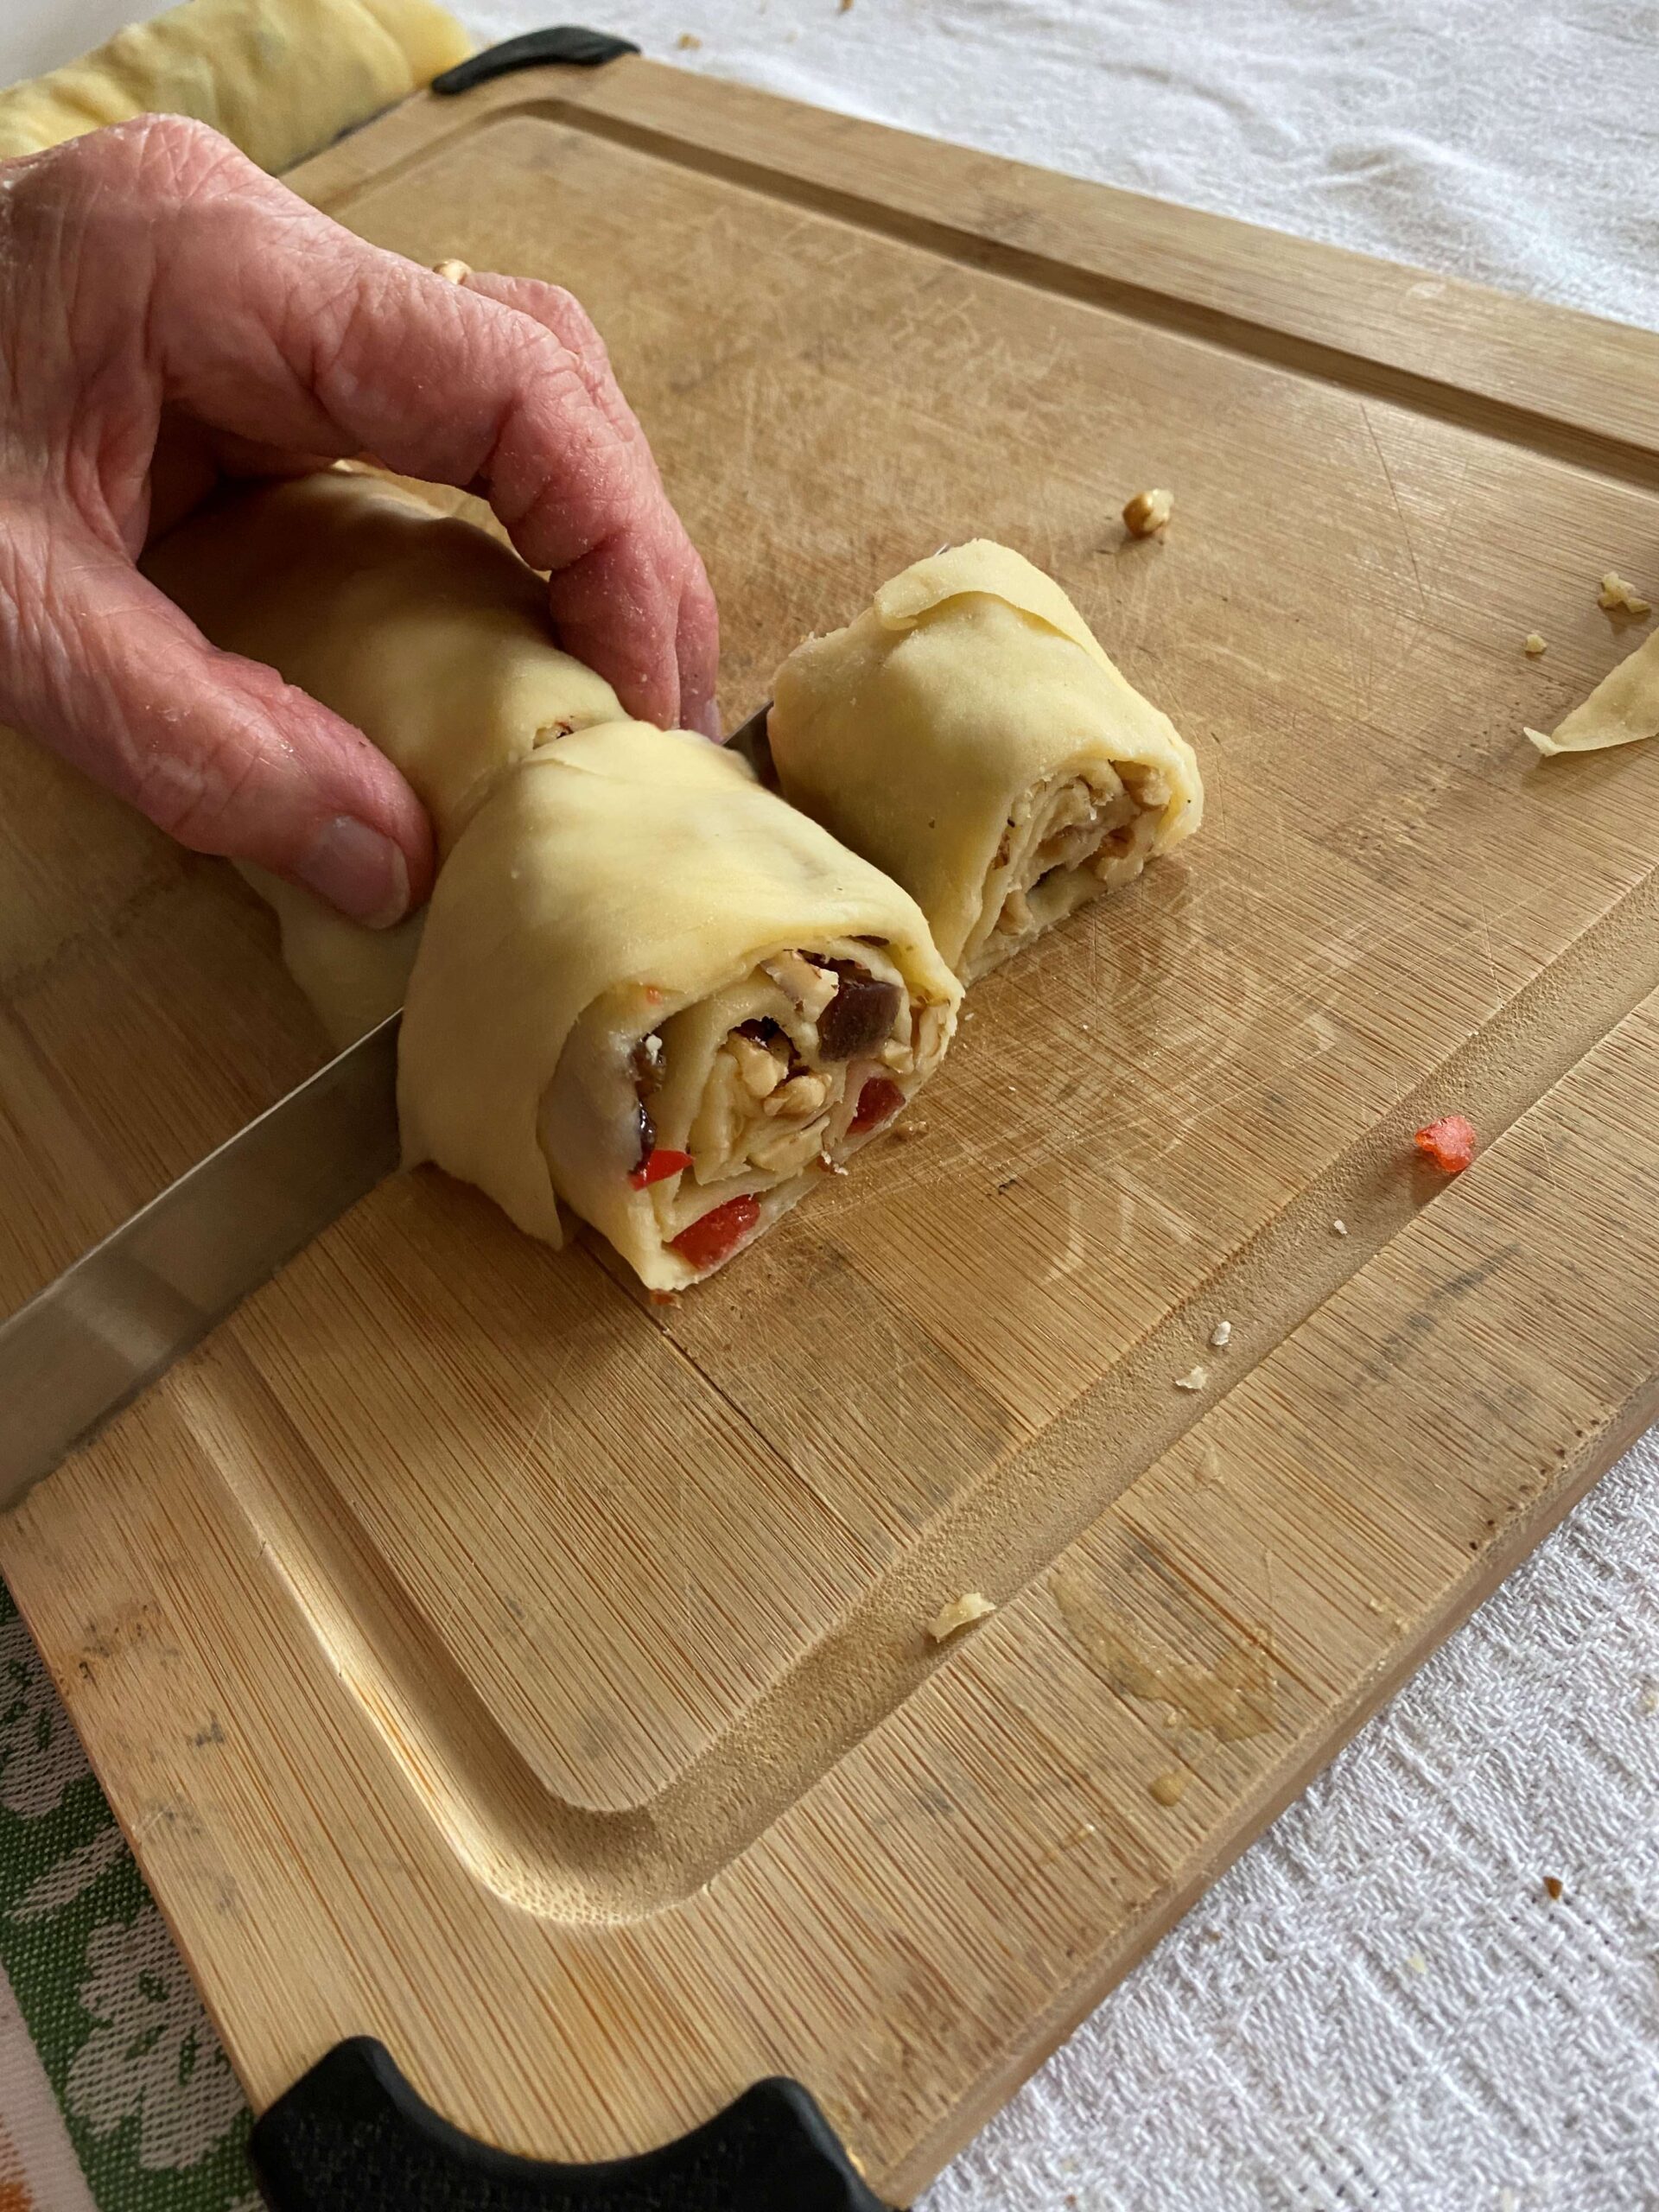
Take the pitta from the short edge and start rolling the pitta with the fruit and nut filling.
Starting at the edge, cut the roll into slices about 2" thick, arranging each slice on the base which you have on the baking sheet. Leave a 1" from the edge of the base as you will need to lift, stretch and tie the edge to the rolls with a string which will go right around the entire pita.
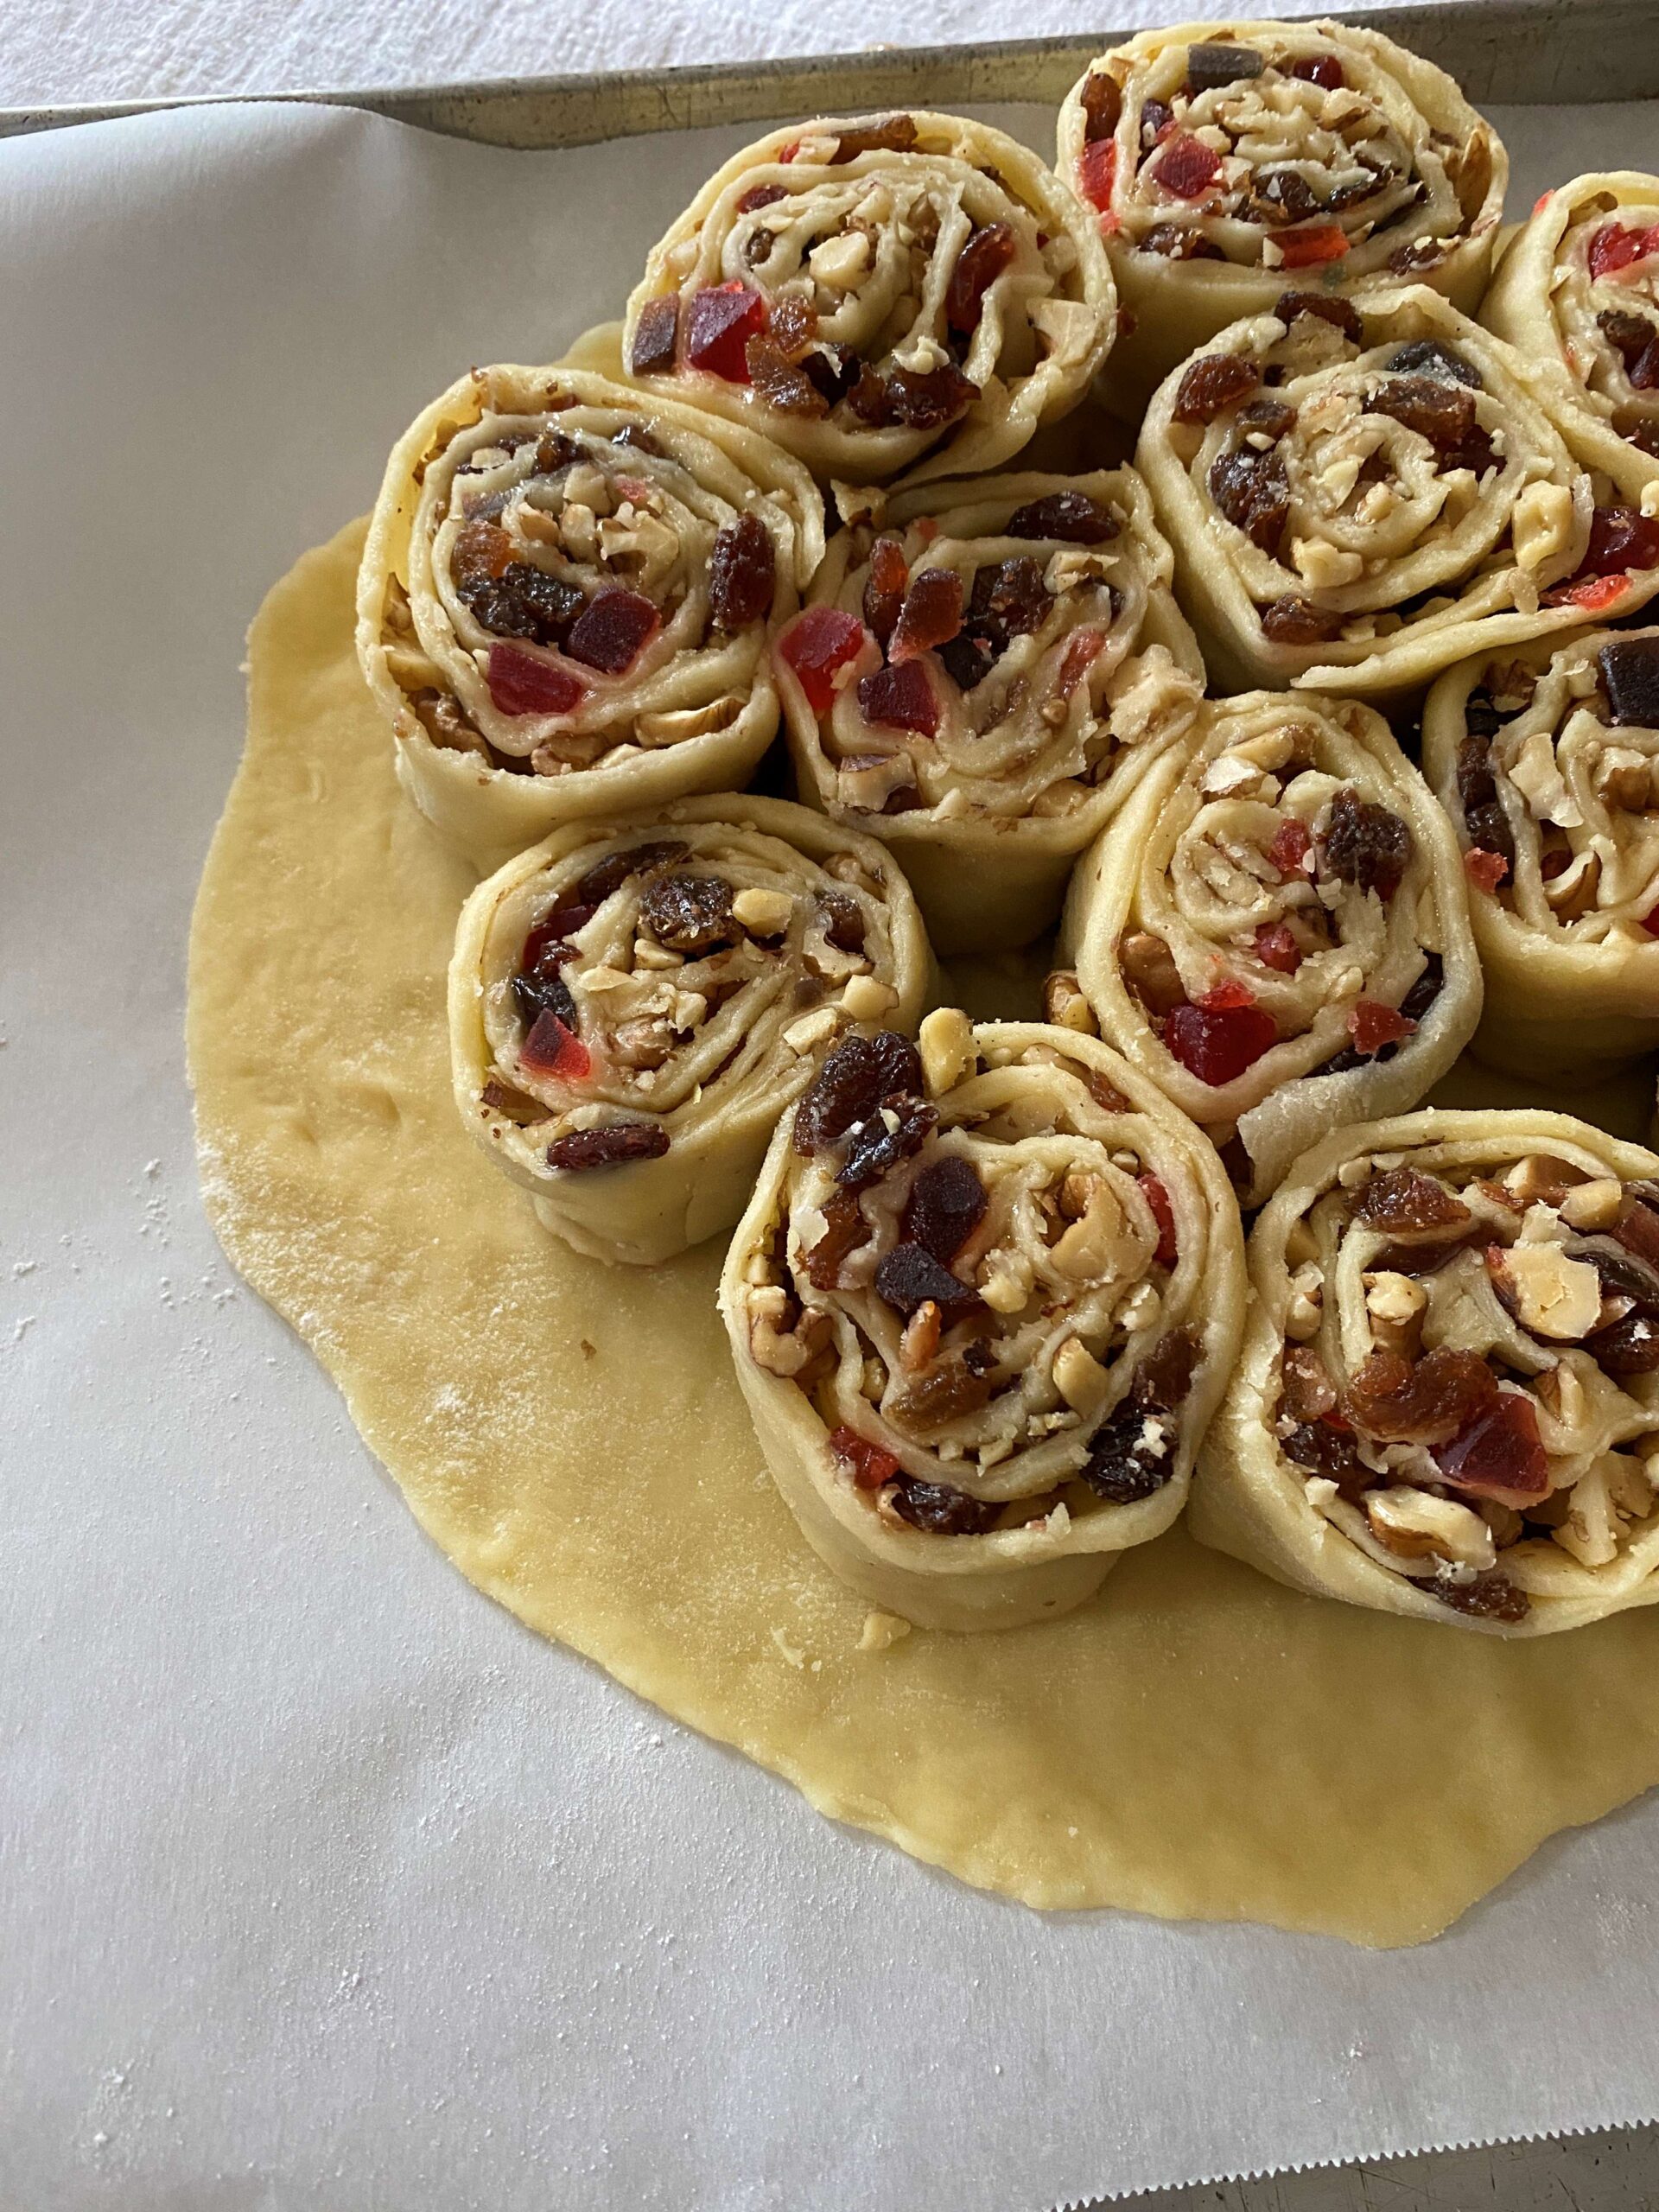
Take another slice and arrange it on the base until you have filled the base and used up all the slices.
Lift the edge of the base half way up the roll slice and using cooking twine, tie the edge in place. Cut off any loose pitta pasta dough.
Bake at 350°F for 50 to 60 minutes or until golden brown.
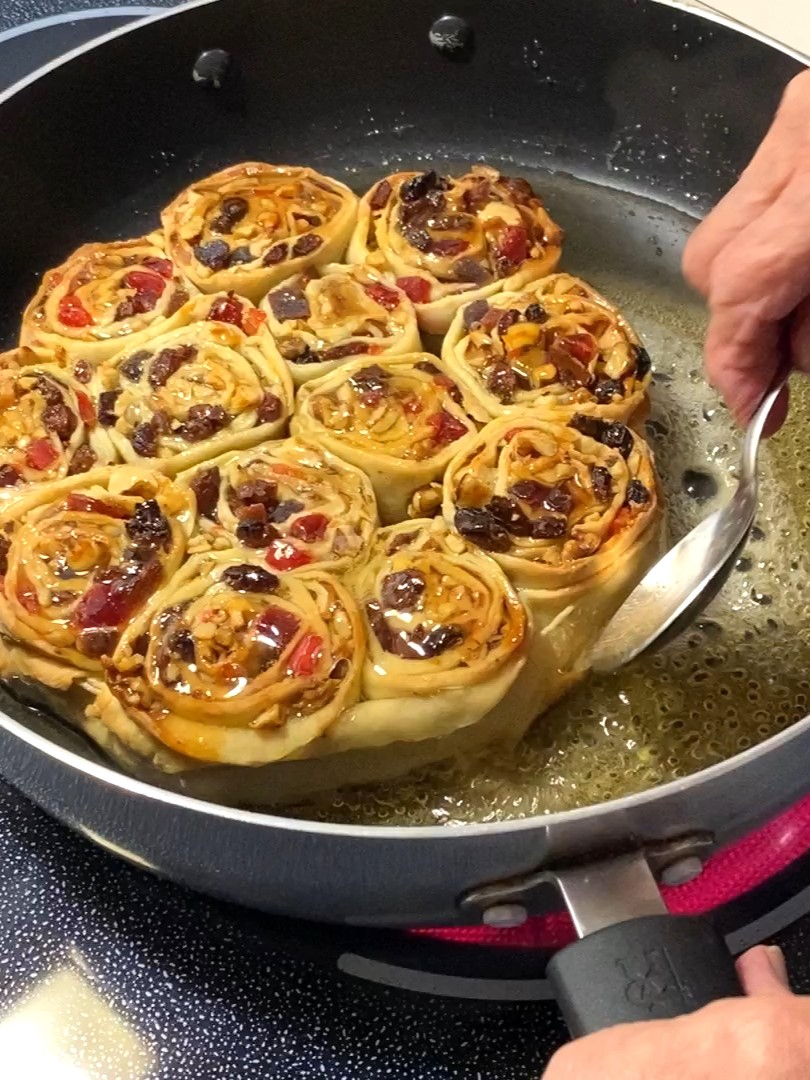
Once cooked, let cool down completely. For the finishing touch: On medium high, heat up ½ cup of honey in a fry pan large enough to hold the pitta. Place the pitta in the pan and use a spoon to drizzle the honey on top of the pitta.
Hint: Don't over cook the pitta. Remove it from the oven once it is stiff and golden, about 50 to 60 minutes.
Substitutions and Variations for Pitta Mpigliata
Here are a few ideas on how you can make this dish different or fit a certain diet:
- Use Puff pastry - make Pitta Mpigliata buns, similar to cinnamon buns
- Dates, other nuts, cranberries, chocolate chips - instead of candied fruit, use other dried fruit like cranberries, dates or other nuts like peanuts.
- Simple syrup - use a simple syrup made of equal parts water and sugar instead of honey. Warm up the water and sugar in a saucepan until the sugar dissolves.
- Forget the Base - instead of arranging the rolls on a base to make one large pie, cook them as individual rolls to serve individually.
- Use Gluten Free Flour - make it gluten free by using gluten free flour.
If you know how to make this recipe unique or suit your diet - go for it! Let me know what you did and how it turned out by leaving me a comment. I'd love to hear from you.
Equipment
For this recipe, you'll need to have candied fruit, baking sheets, different size frypans, a rolling pin and a stand mixer.
This page contains affiliate links, which means I may receive commissions if you choose to purchase through links I provide (at no extra cost to you). Thank you for supporting the work I put into this site! As an Amazon Associate I earn from qualifying purchases.
Storage
Store leftovers in a cool dry place. My mom stores leftovers in her cold cellar or "cantina" in the basement. You can store this covered in the fridge for 3 to 4 weeks.
You can also freeze unglazed pieces for up to a month. Once thawed, you can drizzle warm honey or a simple syrup on the pitta and place on a serving plate. Consume immediately once thawed and glazed.
Once glazed, I don't recommend freezing.
Food Safety
Note that the storage guidelines provided on this page and site are estimates from personal experiences. We are all adults and as an adult you are responsible to ensure that the food you eat is safe to eat. Since, I'm not a food safety expert, you are responsible to review your local guidelines on food storage prior to storing any food left-overs.
Remember to:
- Not use the same utensils on cooked food, that previously touched raw meat
- Wash hands after touching raw meat
- Don't leave food sitting out at room temperature for extended periods
- Never leave cooking food unattended
- Use oils with high smoking point to avoid harmful compounds
- Always have good ventilation when using a gas stove
For Canadian Guidelines check the Government of Canada Food Safety Guidelines or see more guidelines at USDA.gov.
Top tip
The original pita was only made with raisins. Add nuts and candied fruit and any other ingredients to make your pitta mpigliata unique.
Other Desserts You'll Fall in Love With


PIN It Here
Recipe Details
Calabrese Pitta Mpigliata, a Christmas Dessert
https://easyhomemaderecipes.caIngredients
Dough
- 2 eggs
- 2 oz vegetable oil
- 2 oz shortening melted but cool
- 4 oz Dry White Vermouth
- 1 ¾ oz sugar
- ½ oz liquor (sweet liquor, like Sambuca)
- 3 cups all purpose flour you will need more for rolling out the dough
Filling
- ¾ cup raisins
- 1 tbsp sugar
- 1 oz water
- ⅛ tsp cinnamon
- 1 pinch cloves, ground
- 225 g candied fruit
- 1 ½ cups walnuts chopped
- ¼ cup honey
Honey Glaze
- ½ cup honey
Instructions
- Use a medium fry pan to heat the raisins, 1 tbsp of sugar and water until the raisins start to sizzle. Break apart any raisins clumped together. Once the raisins have plumped up, remove from heat. When cool add cinnamon and cloves. Set aside.
- In the bowl of a stand mixer, beat the eggs, add oil, melted shortening, sugar, vermouth and liquor. (make sure that the shortening is cool enough that it won't cook the egg)
- Using the dough hook attachment, start adding the flour one cup at a time as you are mixing the dough on medium speed.
- Keep adding flour until the dough reaches a firm consistency and can be handled for rolling, about 3 cups of flour needed.
- You'll need 1 bottom (8-9" wide) and 1 large piece to fill and roll (10" x 25" wide). Separate a piece the size of 4"x2"x2" to roll out as your base. Use the remaining piece to roll out your large piece (10" x 25" wide).
- Roll out one large piece on a floured surface. Transfer it to a table where you can work on filling and rolling.
- Roll out the smaller piece which will be your base and place it on one side of a baking sheet covered with parchment paper.
- Warm up ¼ of the honey until it is runny and drizzle it all over the large pitta sheet. Begin to sprinkle the raisins, walnuts and candied fruit all over the pitta sheet.
- Take the pitta from the short edge and start rolling the pitta with the fruit and nut filling. You want a long roll about 2" to 2.5" in diameter.
- Starting at the edge, cut the roll into slices about 2" thick, arranging each slice on the base which you have on the baking sheet. (Make sure that you place the free edge on the inside so it doesn't unroll.) Leave a 1" from the edge of the base as you will need to lift, stretch and tie the edge to the rolls with a string which will go right around the entire pita.
- Take another slice and arrange it on the base until you have filled the base and used up all the slices.
- Lift the pasta edge of the base half way up the roll slice and using cooking twine, tie and secure the edge in place. Cut any loose pitta pasta dough.
- Bake at 350°F for 50 to 60 minutes or until golden brown.
- Once cooked, let cool down completely.
- On medium high, heat up ½ cup of honey in a fry pan large enough to hold the pitta. Place the pitta in it and use a spoon to drizzle the honey on top of the pitta.
- Once most of the honey has been absorbed, (about 5 minutes) remove the pitta from the pan and place on a serving dish.
- Serve immediately or let cool and store in a cool place.


Comments
No Comments